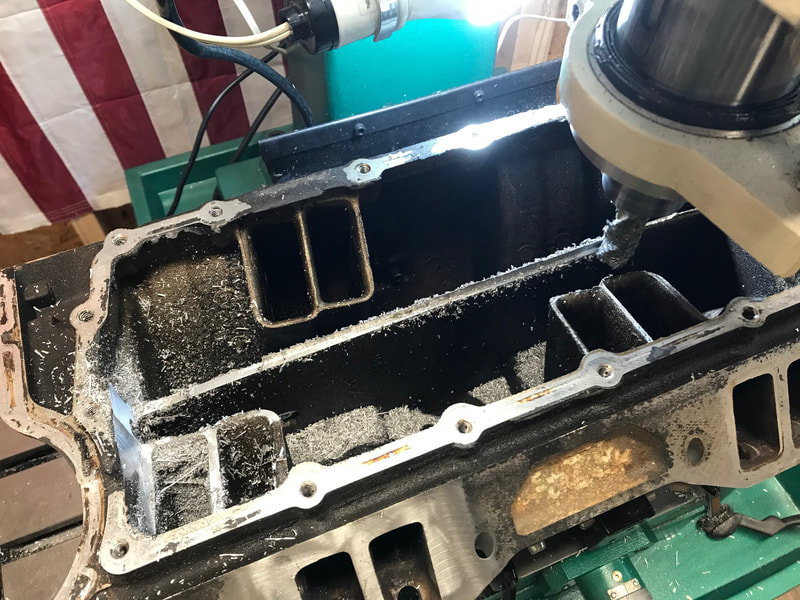
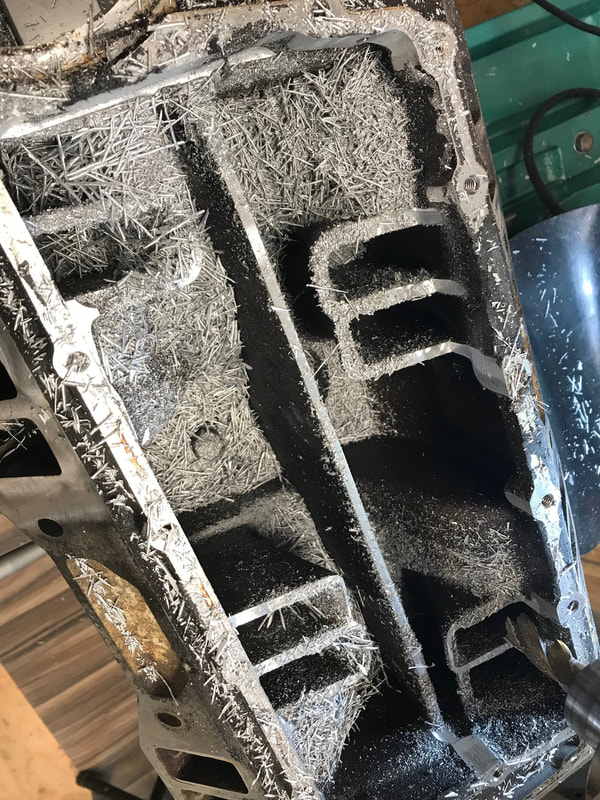
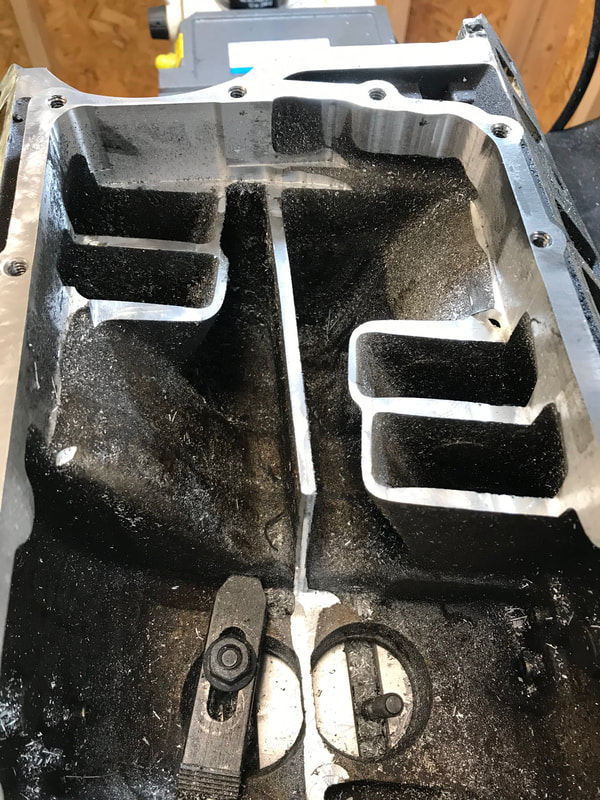
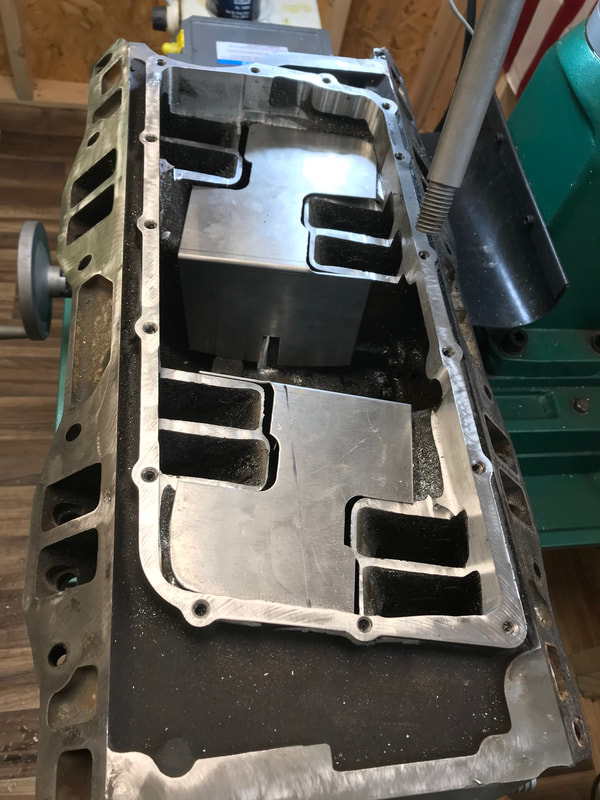
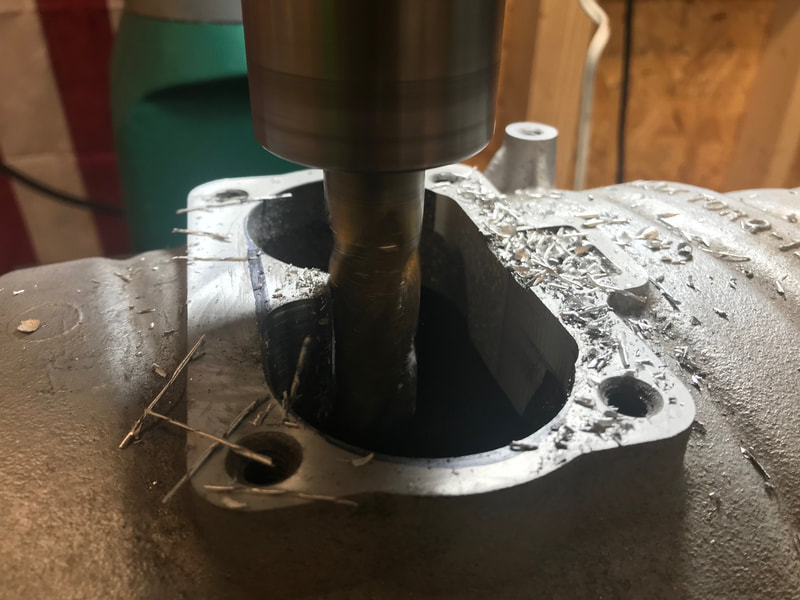
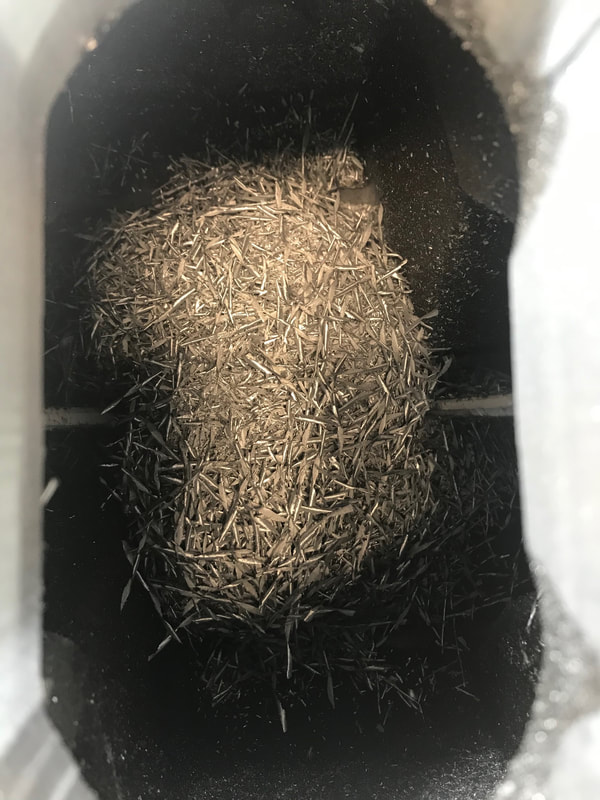
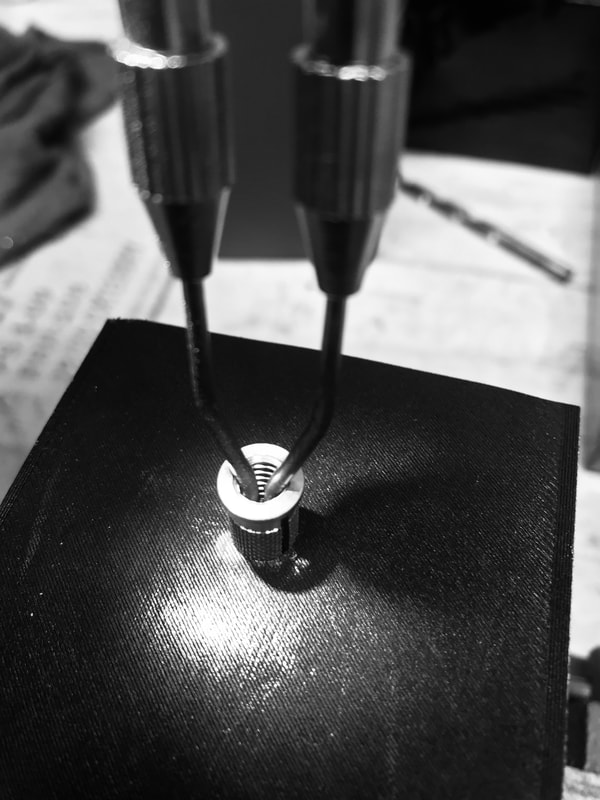
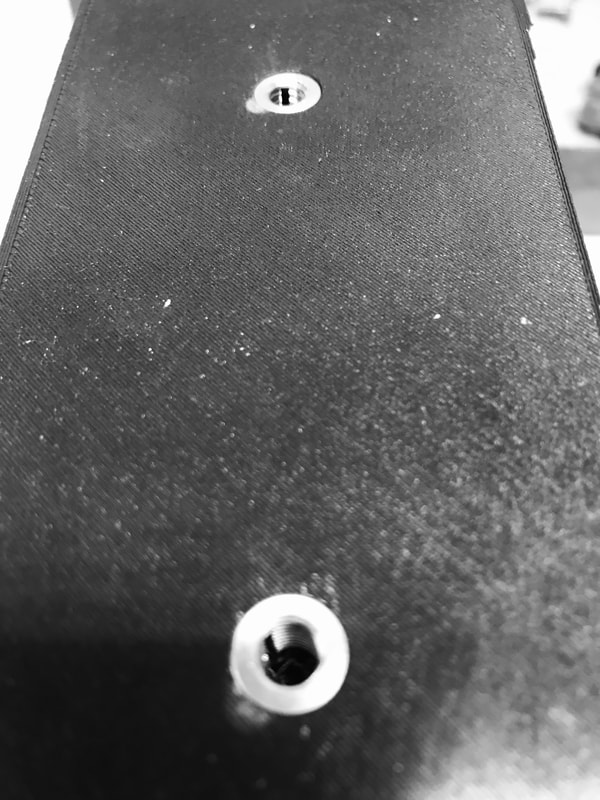
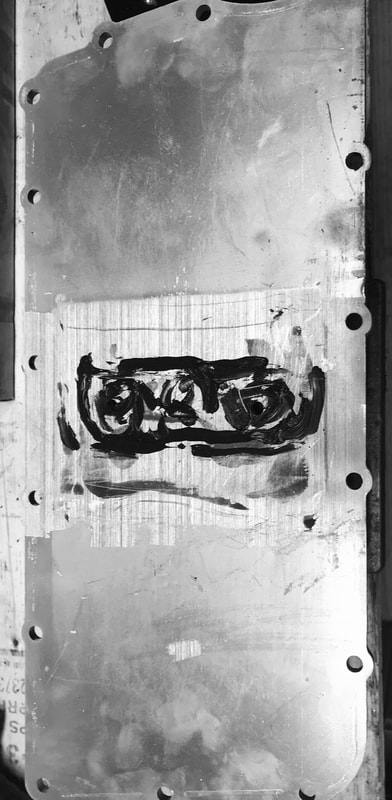
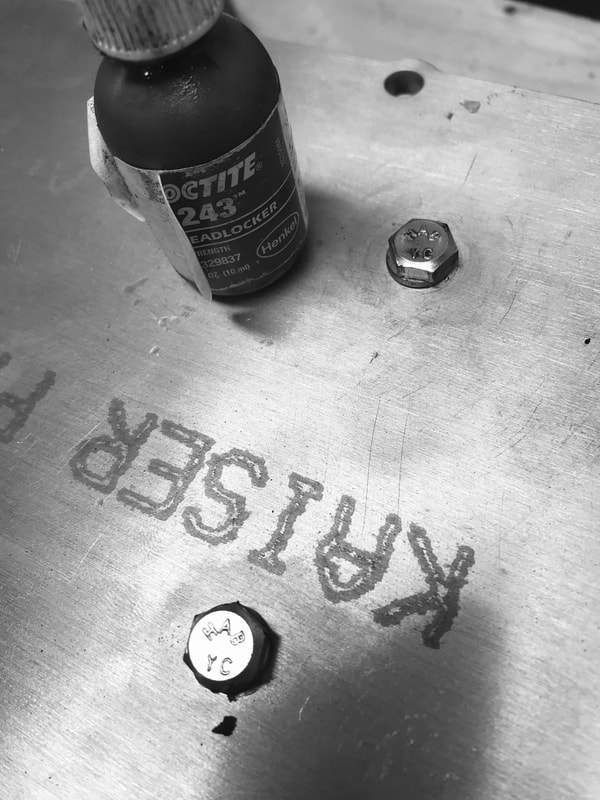
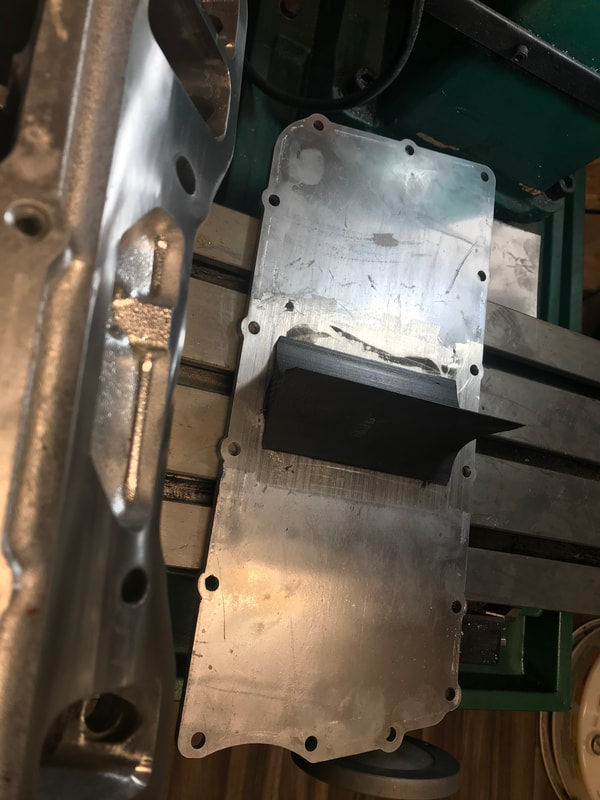
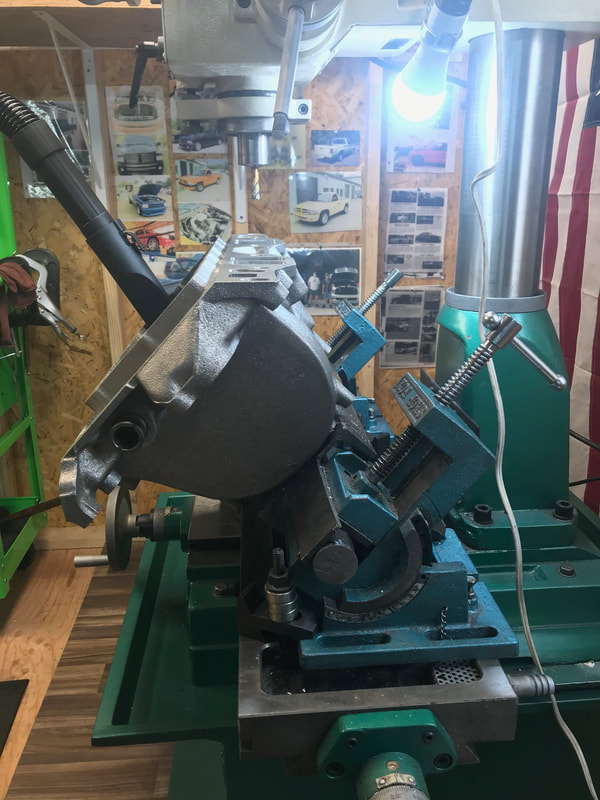
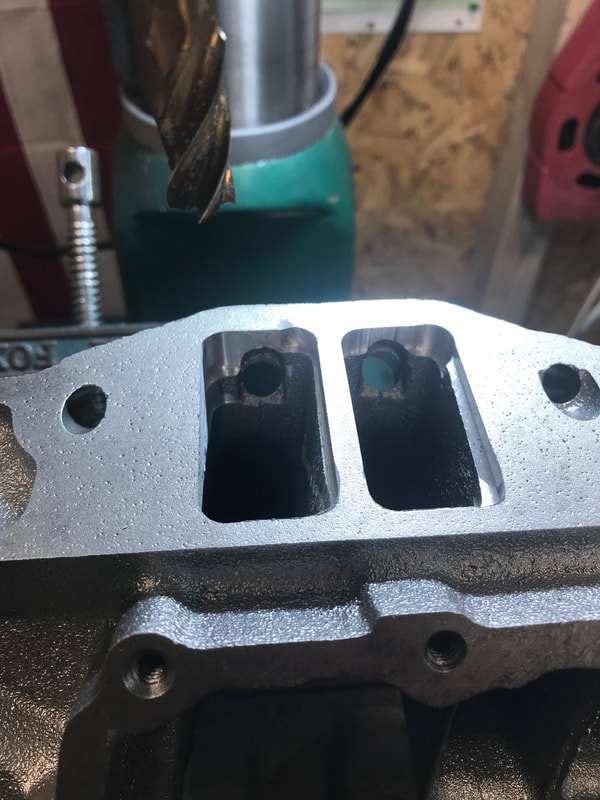
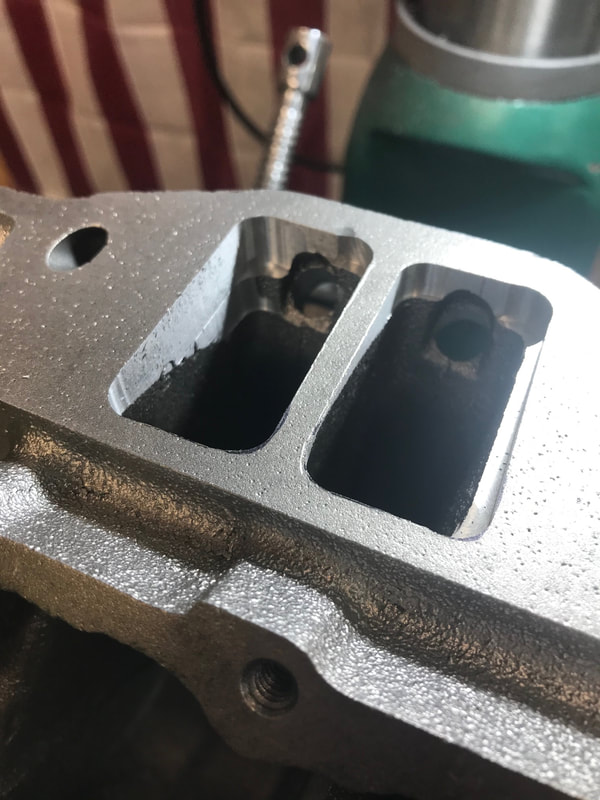
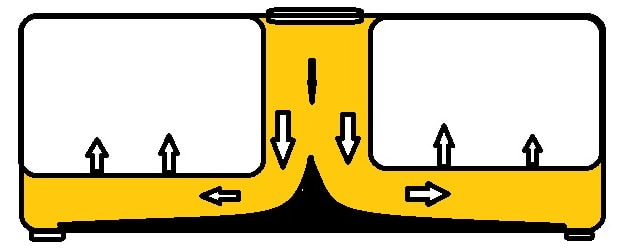
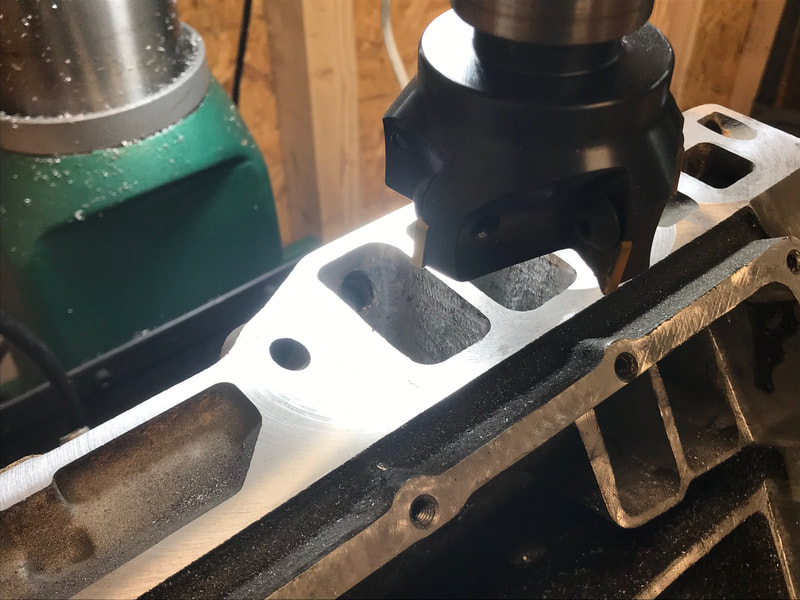
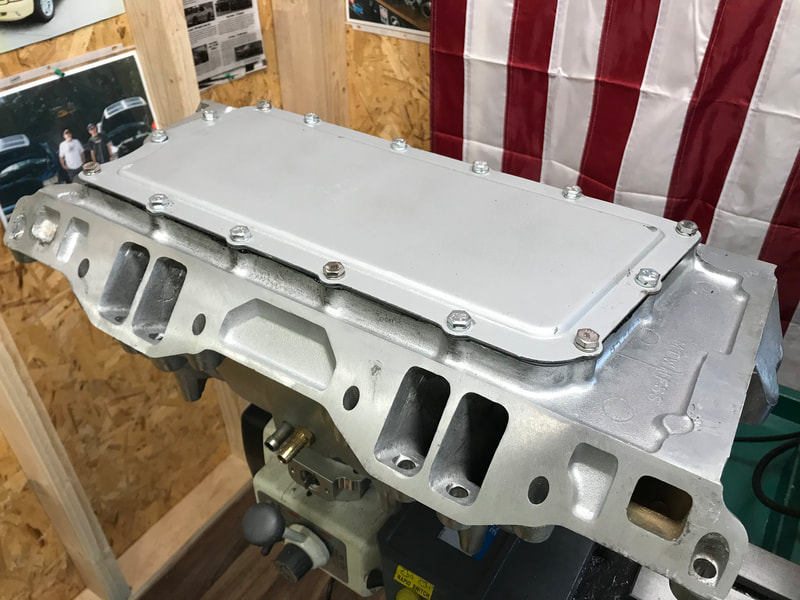
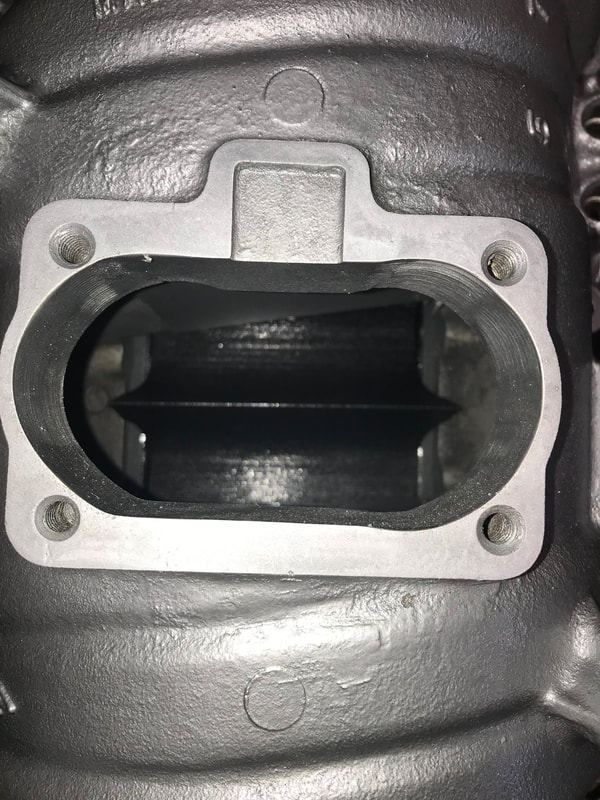
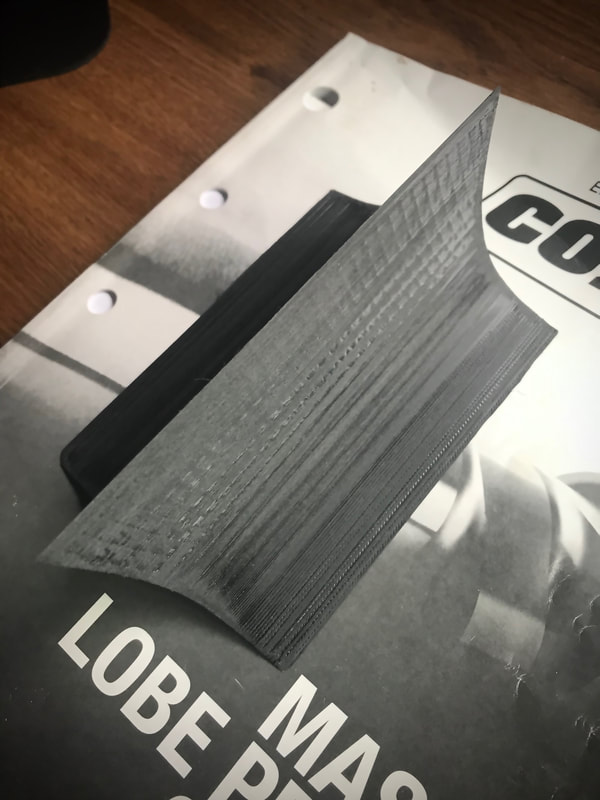
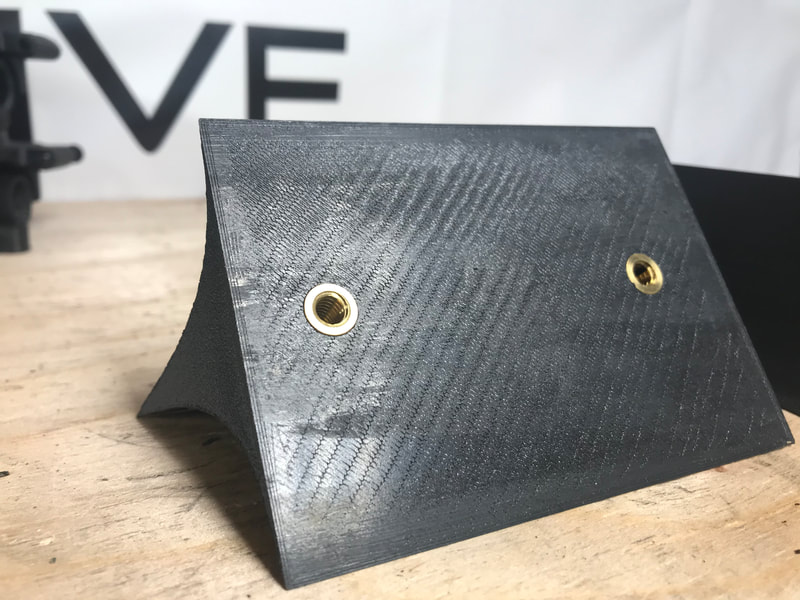
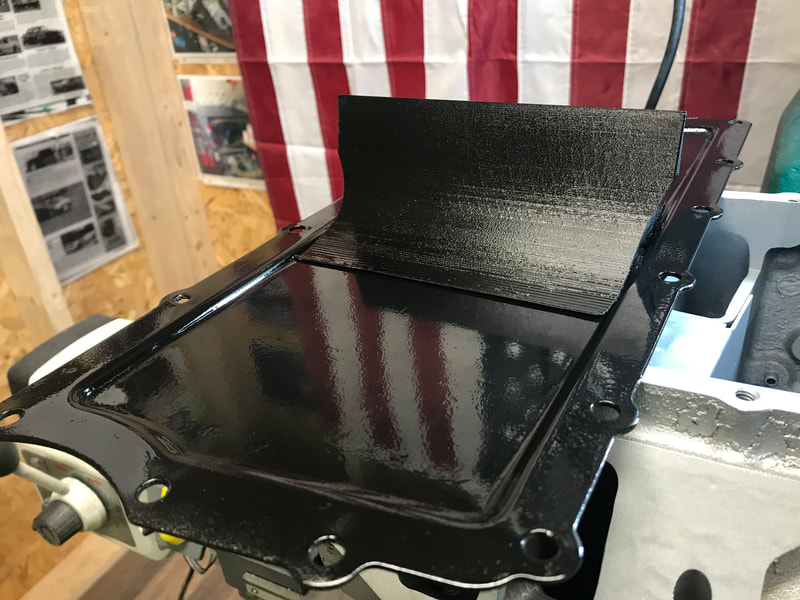
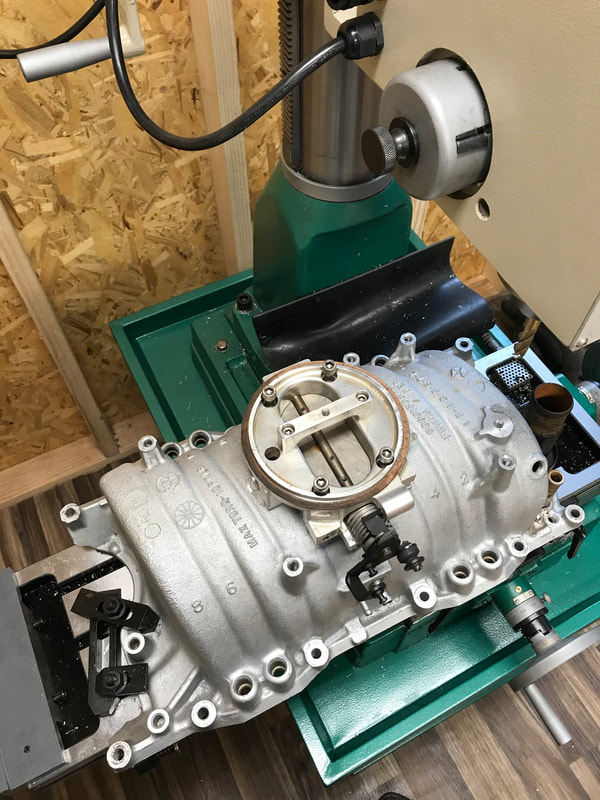
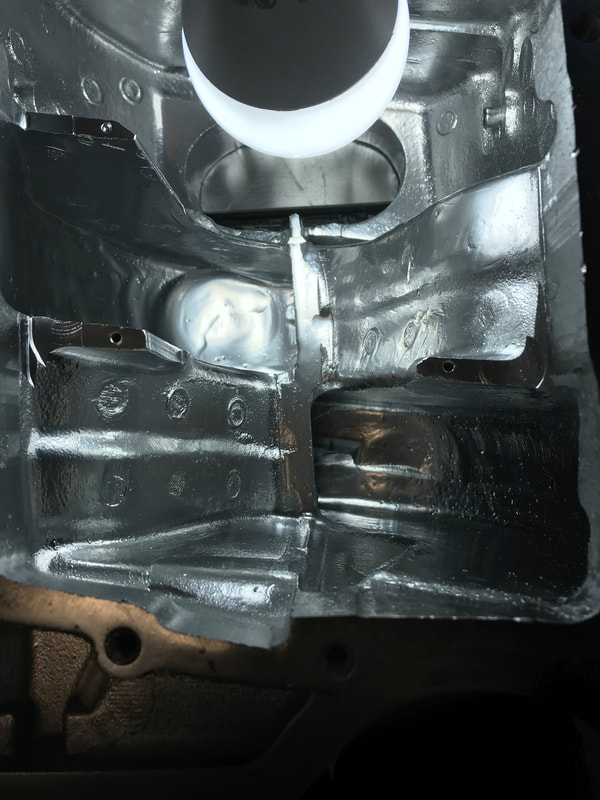
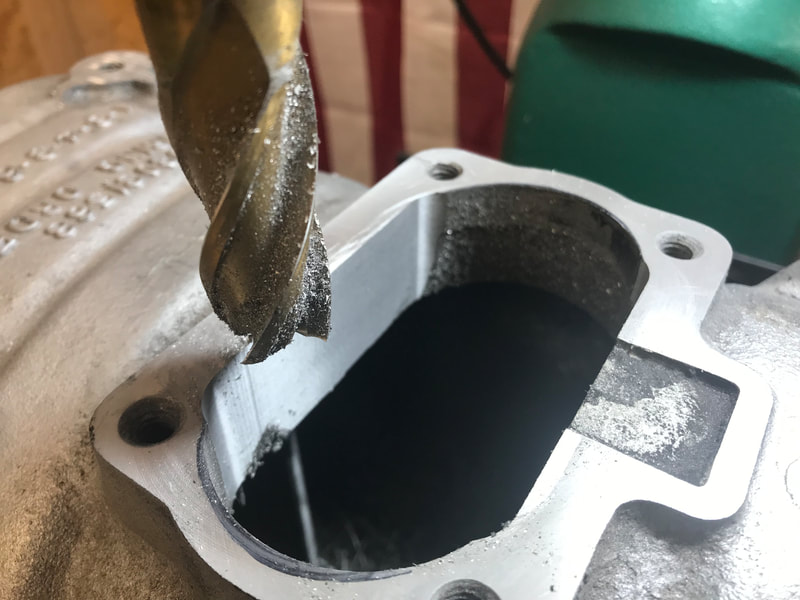
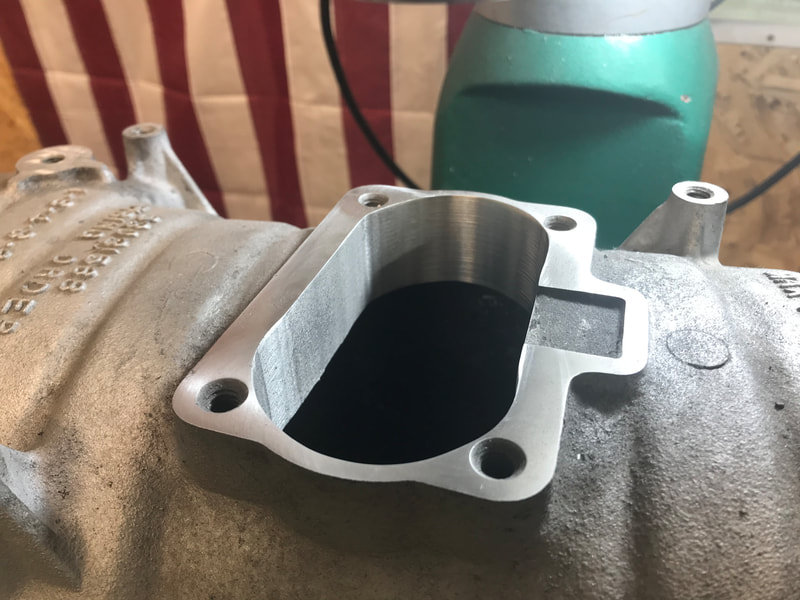
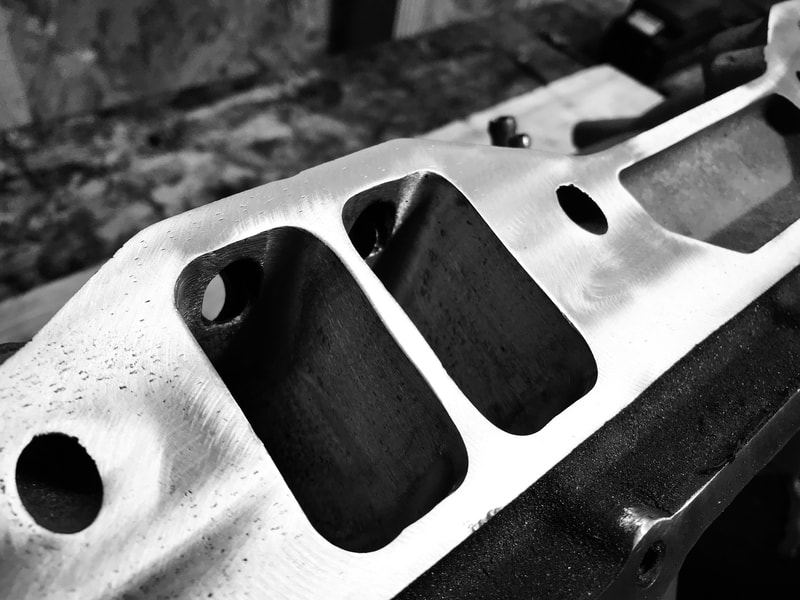
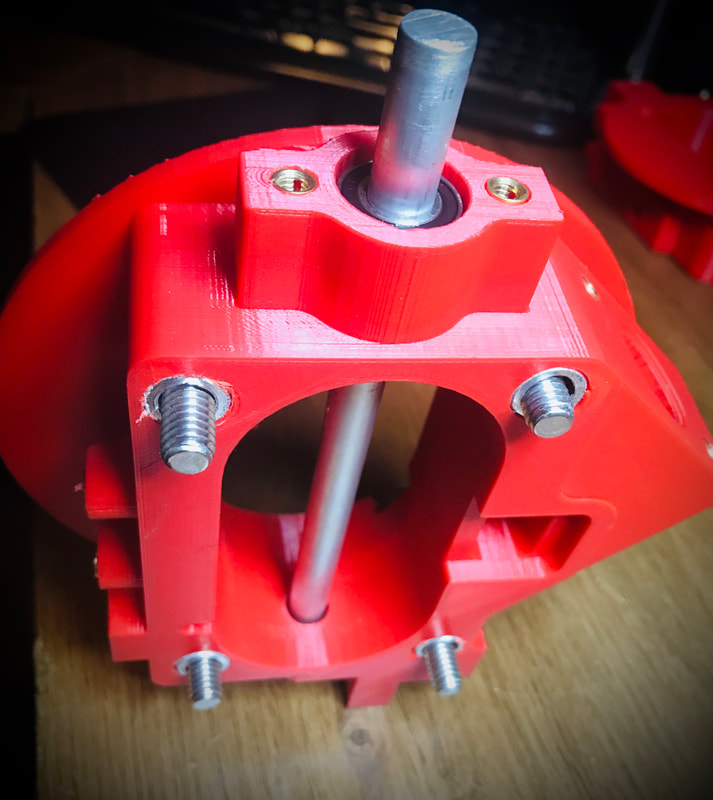
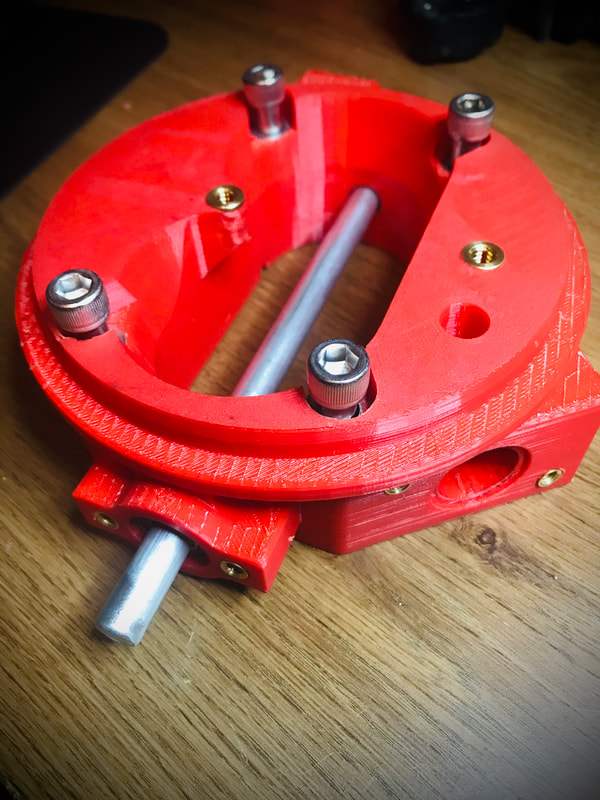
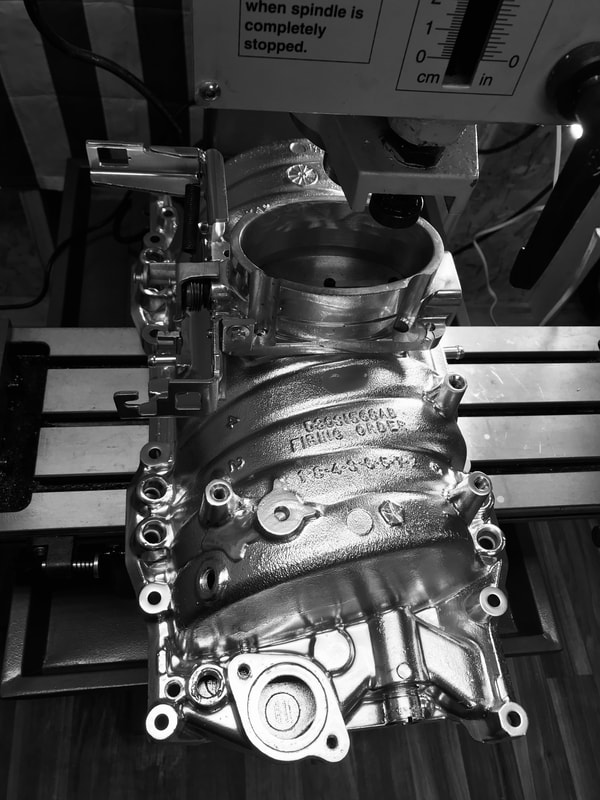
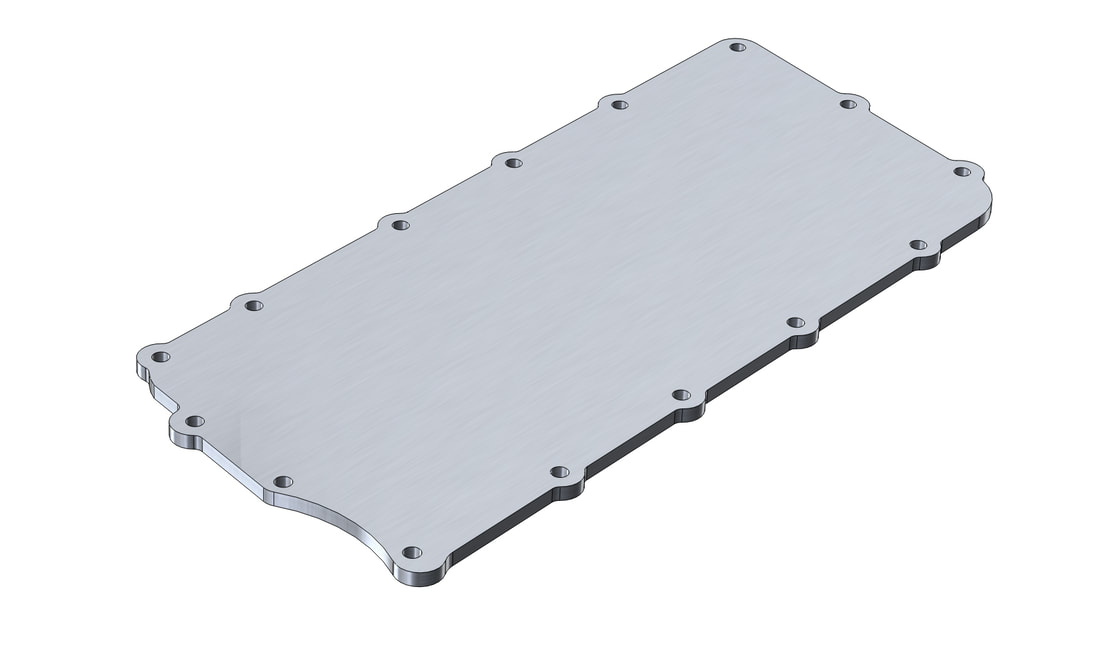
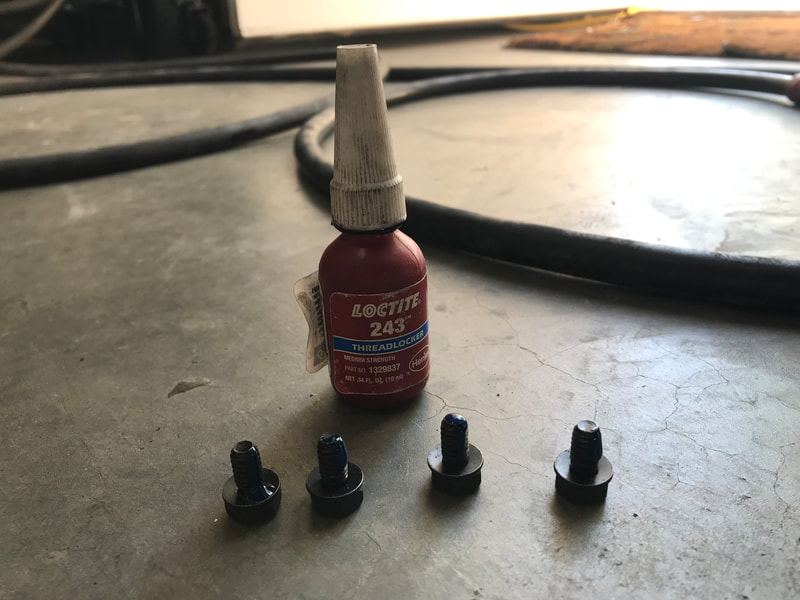
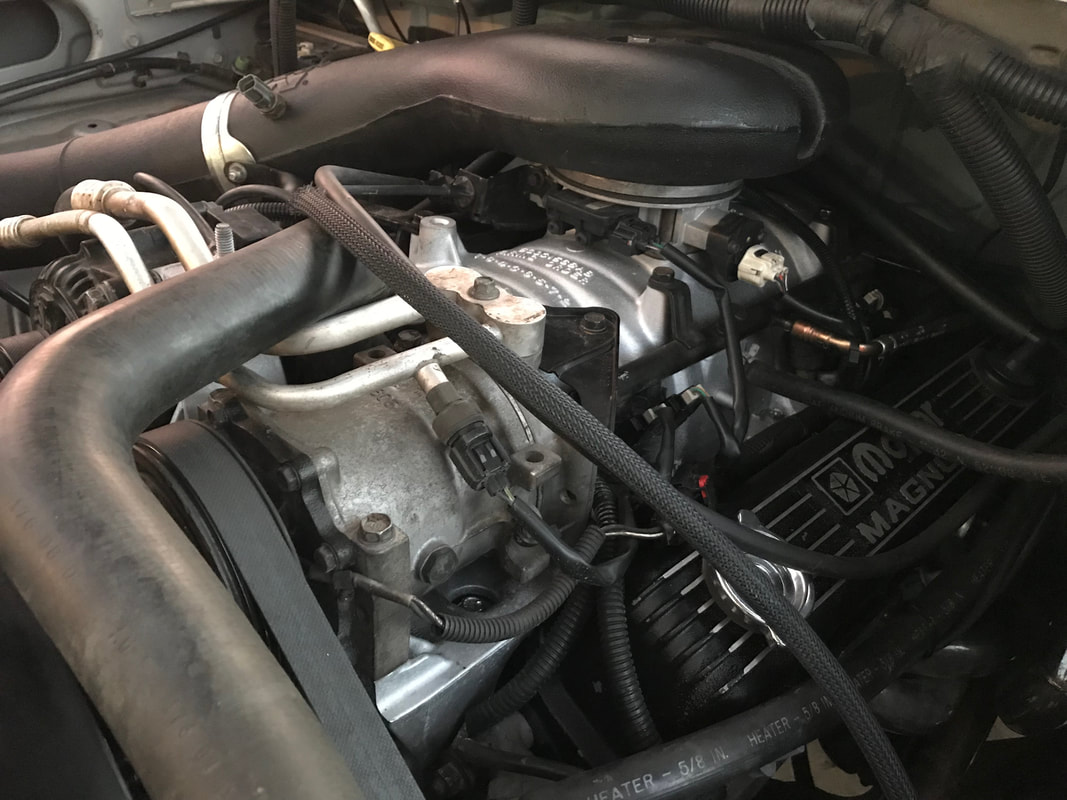
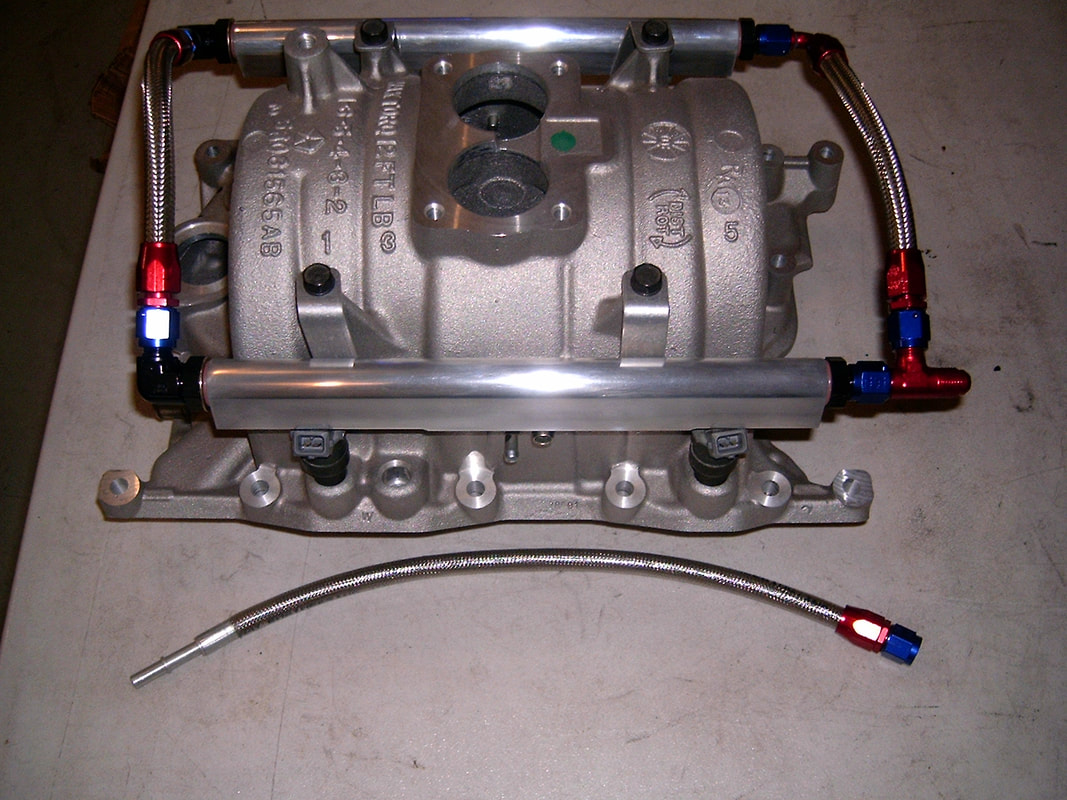
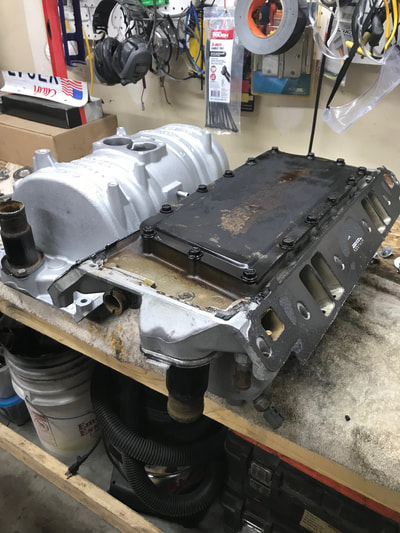
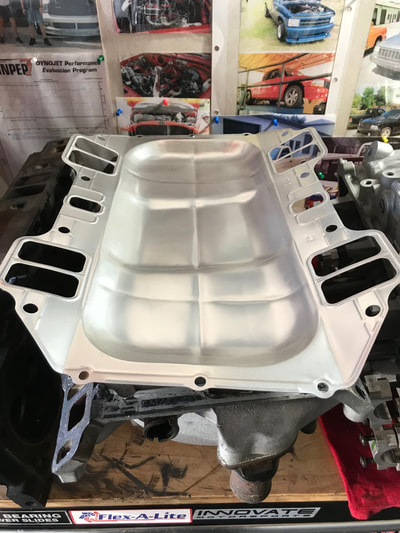
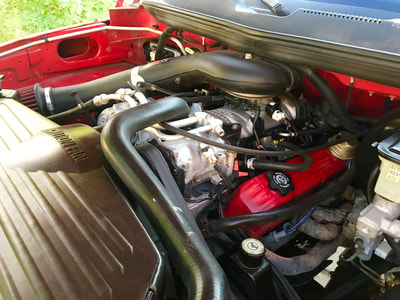
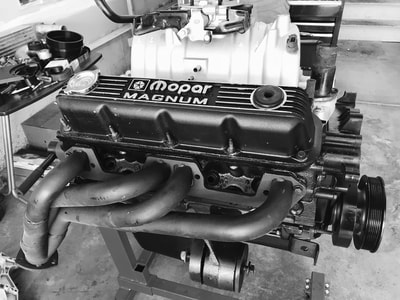
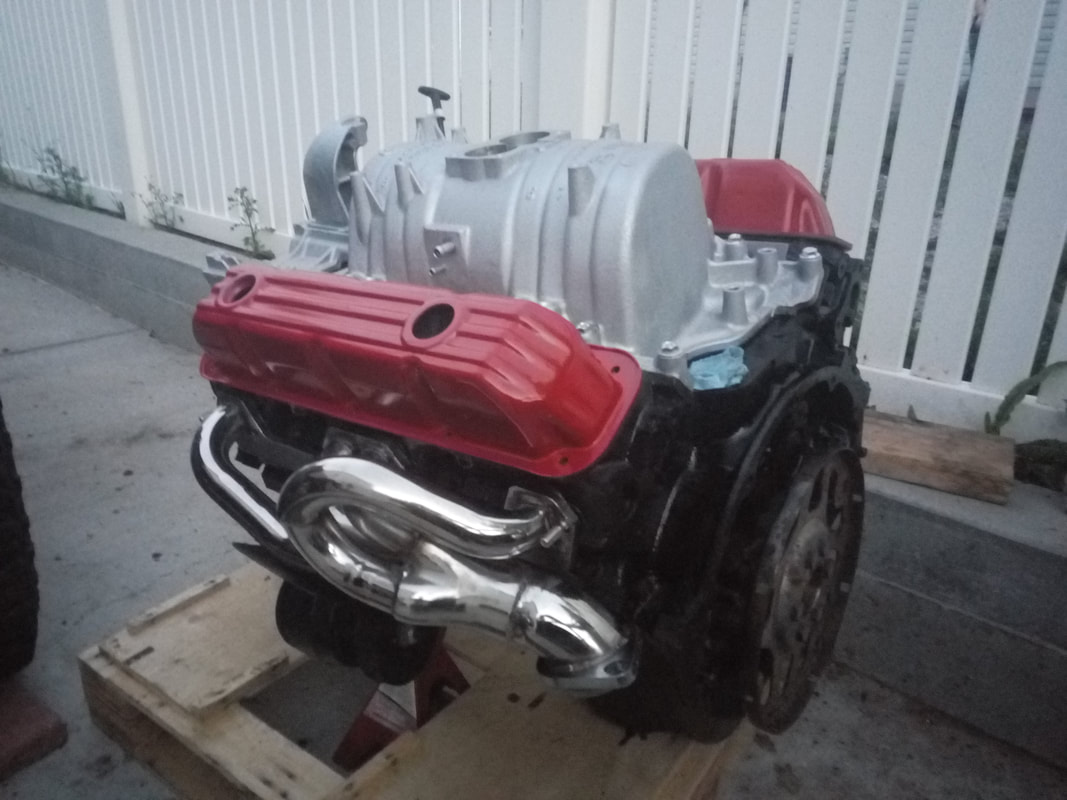
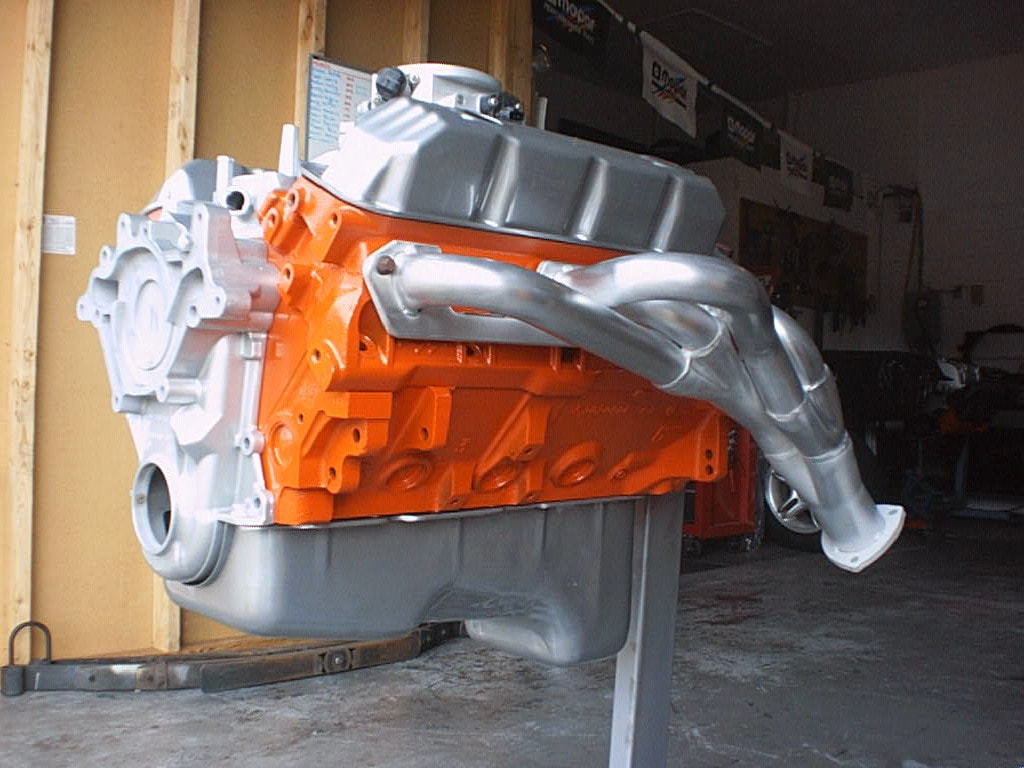
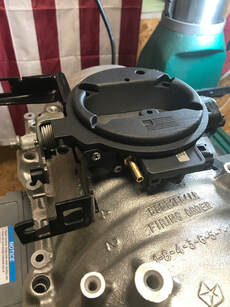
 This blog is to send out some info on the machine work I perform on the stock intake manifolds. I start with finding the rpm range the customer wants. Once that is determined (camshaft, compression vehicle weight) I find out what heads they are running. Usually Performance Injection Equipment will tell me the port intake size of the customers heads if they have ordered from them. Otherwise, I set to a standard EQ or Edelbrock port. Whether the intake they send to me is egr or non egr divider or not, I then base my calculations for runner length. The intake will then be setup for the VRP plates and wedge divider to reduce the volume of the 6000ccs and increase the port velocity. On the milling machine, the manifold is bolted to a custom rotisserie jig I manufactured to hold the intake in place. After I tram the mill, the work on the intake port starts. The top 9/16 hole mount for the alternator bracket is the first to go. It is taken down flush with the fuel injector rail boss so the manifold will sit flush during the process. I normally open the intake ports to a 2.3" by 1" squared port. From there, the manifold is flipped and the work on the inside runners and VRP mounts begin. I actually prefer the divider now as it supports the VRP horizontally. First the divider is opened up in the throat under the TB, then the sidewalls for the plenum are squared up. The runner length is set normally to 14" which is flush with the VRP plates. I then drill an tap 8/32 holes for securing the VRPs. Once that major rough is done, then it is onto the port widening. Most heavy shaping is done with a 6" plunge mill ball end. When done from both sides, I switch over to the electric dremel and the aluminum burrs. The key is staying on the top side of the port for increasing the diameter. The low side is simply cleaned up and using a long 60 grit sanding tape, the hump is smoothed. The walls are worked until I have an area in the top part of the port that crosses 1/2" from both sides. Cartridge rolls are the final smoothing process. I spend anywhere from 12 to 18 hours for all this work. The shop vac is in the ports keeping the mess to a minimum. Once the finish is complete, the main inlet port then gets opened up just like any M1 inlet, but larger to accommodate the new 108mm monoblade throttle body seen above. The easy part is next, the manifold is then surface milled on the intake sides and then tanked and cleaned. Once out of the wash, the VRPs are installed, edges RTV'd and the plenum wedge is ready to install. The debate is whether to install the wedge at a matching 30 degree angle or simply perpendicular on the belly pan. I install it perpendicular. That is how I have dynoed and may experiment later with clocking it, but for now, horizontal. I measure the end to center from the throat and install the wedge centered on the plate. I use 150 grit sandpaper to smooth the layer build lines in the Wedge, and then clean. I mark the 1/4-20 holes, drill them, apply RTV under the wedge, lock down the wedge with (was red) Green LocTite, then make sure no RTV squeeze out has shown. The Wedge is larger at the top compared to the lower, so installing the plenum plate with a fresh gasket and skim coat of RTV requires angling the wedge plate slightly to install the plate. Shorter stainless bolts are installed with Loctite Red and lock washers. The manifold is quick cleaned and set aside for a 500 degree coat of Silver paint. The key to this manifold is keeping the velocity high, matching runner length to the combo and opening up the ports to match your head CFM. Stock they flow in the 170-180 cfm range. Stock magnum heads make 210-215 easily, your intake cannot feed them. Perform the work below and you can match your 290 cfm ported heads easily!
0 Comments
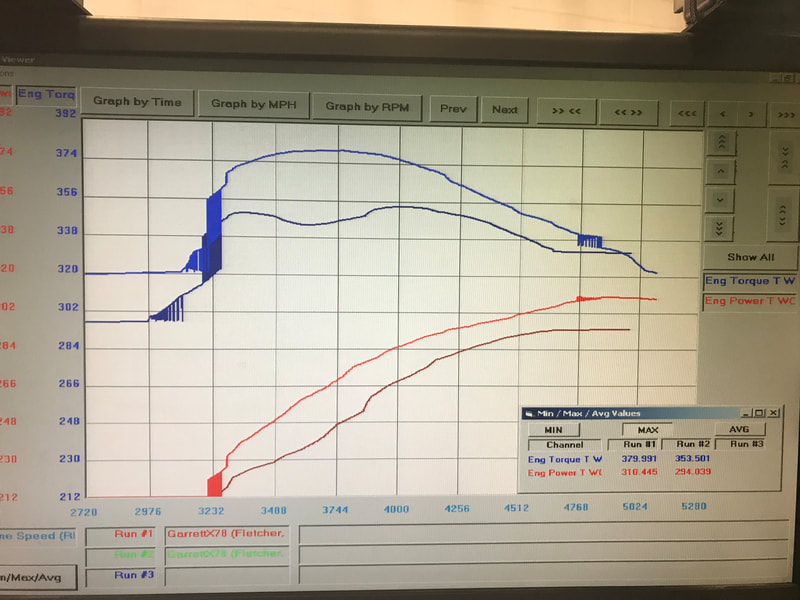
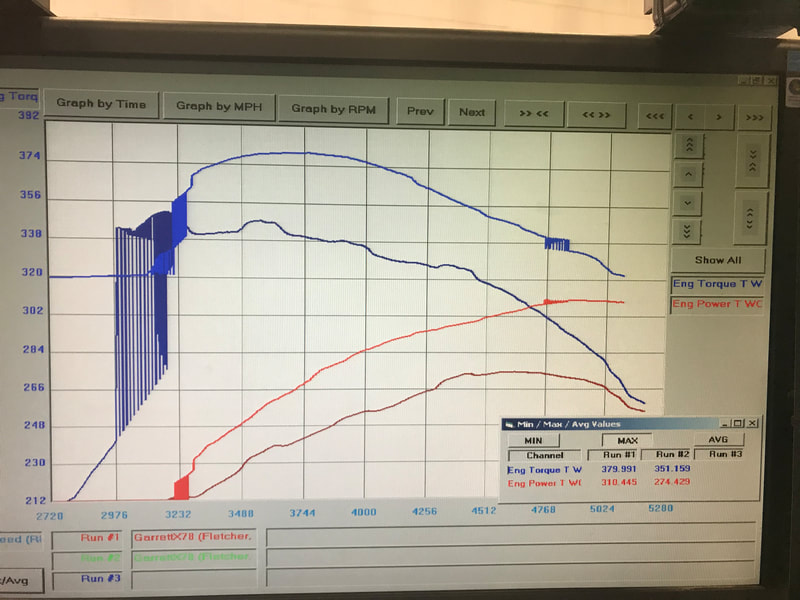
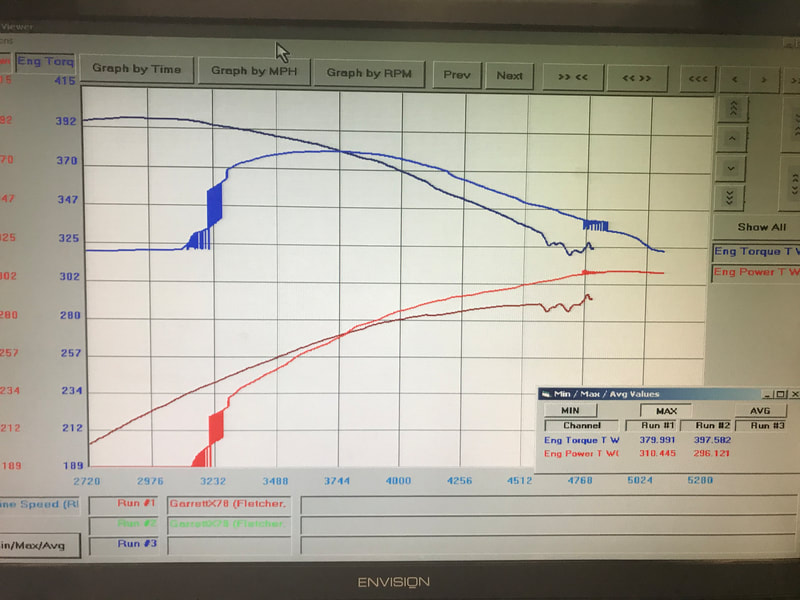
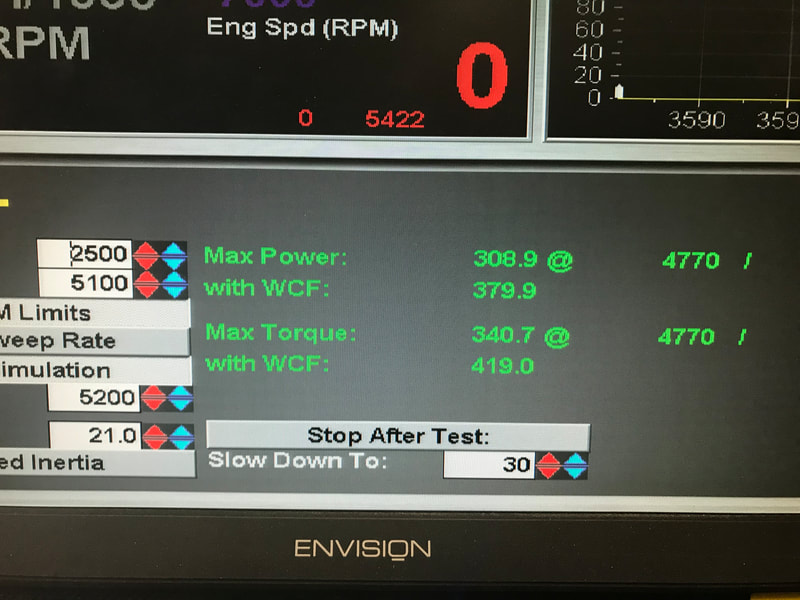
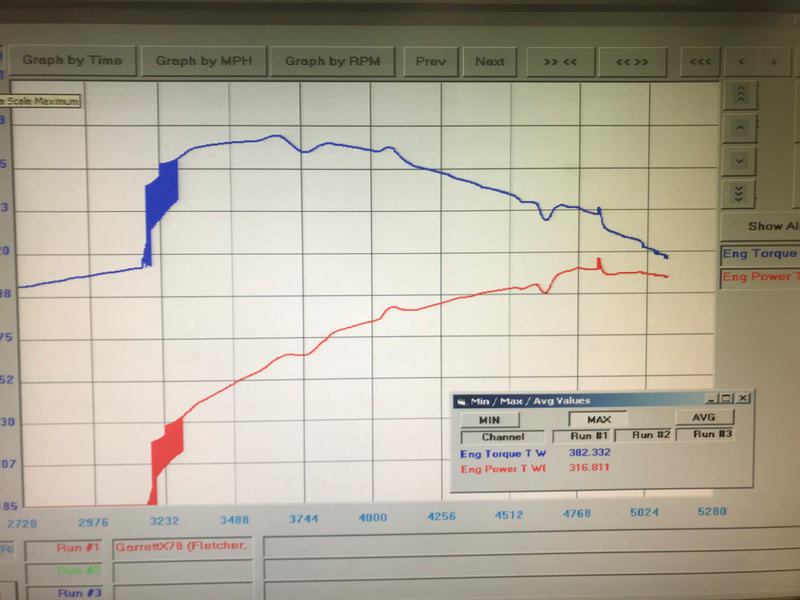
So in my last dyno video of the test truck running the UTP500X cam, I made the comment that the Magnum heads (stock 'cept for valvesprings) were done and squeezing any more out of them would be tough. Boy was I wrong. We installed the new modified Kegger intake, raised the floor 1.7" reducing the volume, cut the runners to 7" in length, then ported to 2.3 cross sectional area. To mix it up further, I machined a AccuFab 1280 cfm oval throttle body on top with throttle and kickdown brackets to match. The dyno is scheduled soon and numbers will be up to compare to the previous 336rw 403 tq. But what is cool about this combo is it is simply 4 major items on a fresh rebuilt 360. Long tube headers, modified intake, camshaft and a tuner. Other cool items are a smaller crank pulley, Mopar windage tray, UTP Valley Pan heat shield and a trans built by Randy's Transmission Tooele Utah. This is all on stock cracked Magnum heads. Next are a set of Performance Injection Equipment ported Edelbrock heads. All the old theories of 'how a 52mm TB can hurt you' and 'Keggers never see anything over 4500 rpm' are finally put to rest. Its time to stop running carb intakes and step into the 21st century with tech. With that, my little shop is finally complete. My vertical milling machine and 3D printer are working hard to churn out some cool stuff. I am porting stock intakes, setting runner lengths for customers now. The 3D printer is a large volume enclosed G Code CAD machine that is currently assigned to printing out Poly-carbonate infused with Carbon Fiber throttle bodies. The first design is a mono blade instead of two bores. It has a 20% larger flow area over stock. Once the CNC shop finalizes the throttle shaft and blades, I can start assembling these lightweight heat resistance super strong throttle bodies. Testing will be done for about two months with selected customers plus our Rams here. This design will work on M1 2bbls, 4bbls , AirGaps and a kegger that has a throat venturi machine to match the old M1-2bbl. All Keggers worked in the shop here get that done. After Spring release, I will work on a larger oval and a twin 53mm for those who do not have a kegger opened up to the mono blade pattern. I can then also look at the v-10 and 4.0 Jeeps. But the spring plans are to start producing a new carbon fiber intake manifold printed and a new valve cover design with a removable top for super easy valve adjustments. A redesigned timing cover and carbon fiber oil pan round out the list. So as you can see, I have a nice schedule ahead of me for 2020. Stay tuned (get it?) and check back often! In the past year, the limits of the stock intake and heads in stock form have been built upon. First, after much flowbench work on the stock Magnum heads, we determined the max cfm at a specific lift. Using that 210 cfm number, I knew the horsepower potential the engine was capable of, using a long 18" runner. So work started on a single profile camshaft lobe that was not too aggressive that could be used on stock heads. That is where the UTP450 was born. Mild ramp on the roller lobes for the stock springs to benefit from and lift no higher than 0.456 to stay far away from bind. The head flow maxed out at 0.450 anyhow. With that design, the only item needed was a tune using the SCT or Syked (now HP also) and a tighter timing chain set ensuring no timing events were straying from where it was installed. Using the kegger intake un-modified, the rewards were great. The combo really made 450 tq and laid down a solid 350 tq at the tires. This was for driving, max peak torque at 3000 rpm, not 4500 as in the short runner intakes that are out there. The next hurdle was the low 170-180 cfm flow of the stock intake manifold. Somewhere in the mix of tearing them apart, I could not help but see the huge 6000cc's of plenum volume and wonder if the velocity could be sped up to the runners. That is when the CNC machine birthed the Volume Reducing Plates known as VRPs. What an outstanding gamble on the test trucks that turned out to be. From 1500 rpm to 3000 rpm, the tq responded much greater than the open plenum. Add a CNC heat shield that started life from a big block 383 valley pan, reducing the heat on the intake allowed me to run lower octane fuels on better spark advance curves. In the end with stock heads, the big Ram on 37s pulled off 240+ rw and 350 tq. That is where the next test Ram running a 10.8 compression 360 came into testing. The UTP500 cam changed from the 215 duration to the 220. Running the same mods and dyno testing at 5000 feet, the truck made 290+hp and 370+ tq. At sea level it really enjoyed the extra 30% oxygen and made 336hp and 403 tq! So it was time to rethink the port flow on the stock intake. Long reach bits and port matching the runners to the intake side of the stock heads was next. After many hours, 24 total of shaping and grinding, the CSA was opened up to a nice 2.28". In the time of that work, a good friend sent me his Hughes Airgap to test on the dyno. Power was 290+ but had dropped to 350+ in torque. Now one could bump the stall convertor and steepen the rear gears to enjoy that, but the peak tq once again was all the way at 4500 rpm. Nowhere near where my daily driving was at. With the stock kegger opened up 14% the dyno was again rolling. But I did not make it to the dyno without making a taboo mistake. I changed the camshaft profile. The stock heads only had a valve spring upgrade, the standard Mopar Performance 062 springs. With that, I needed a camshaft profile that would take advantage of the EQ and Edelbrock flow cfm numbers at 0.500" lift. Well above the stock Magnums. Choosing the Extreme Energy lobes, the only thing that changed was the lift. From 0.456" to 0.507". Would the Magnum heads that make no more cfm at 0.450" of lift produce anymore power on this aggressive roller ramp profile? Would I exceed my best torque numbers of 400 up at 5000 feet? Well, no. While peak numbers are good for selling, the better way to weed through the info is the average gains. The new camshaft was dialed in for a flat 12.8 afr with 34 degrees of total timing and posted 310 hp and 379 tq. Before was 296hp and 397 tq. SO a few things to consider are- first, the heads make no more cfm at 0.450 lift and pushing that slowed the cylinder fill velocity. Number two- the intake port CSA is too large for the stock Magnum head. But the good part is that from 3800 rpm, both HP and TQ where 15-20 higher to 5200 rpm. That explains why the truck pulled so well on the street from 3500 on. So that brings us to the next test, better heads. Either Performance Injection Equipment will setup Engine Quest 2.02 heads or I will splurge for 2.08 Eddy heads prepped by them. I am certain that the current large CSA manifold is not a restriction to them. Also in the works is testing a larger oval throttle body I am machining into place. Now none of this is to say the stock intake is the best, it certainly is not. A whole new intake design needs to be cast with an adjustable runner such as the LSX. For race applications, the shorter 4" runner would be used and for heavy street/ 4x4 the longer 16" would be used. That would be optimal. Maybe we will see that. But till then, I will keep nickle and diming' the combo for the best torque output, because everyone has heard me quote this: Build for torque, and your horsepower numbers will fall into place... Here are the dynos and work completed.
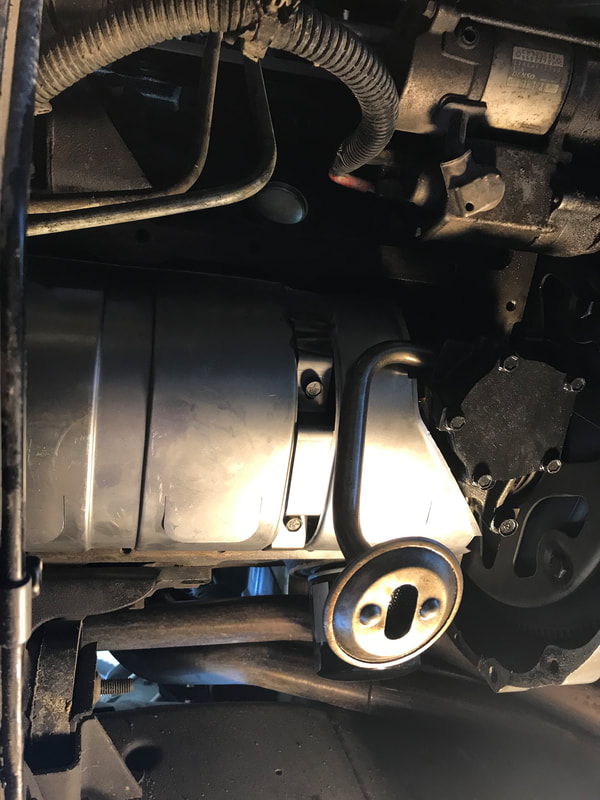
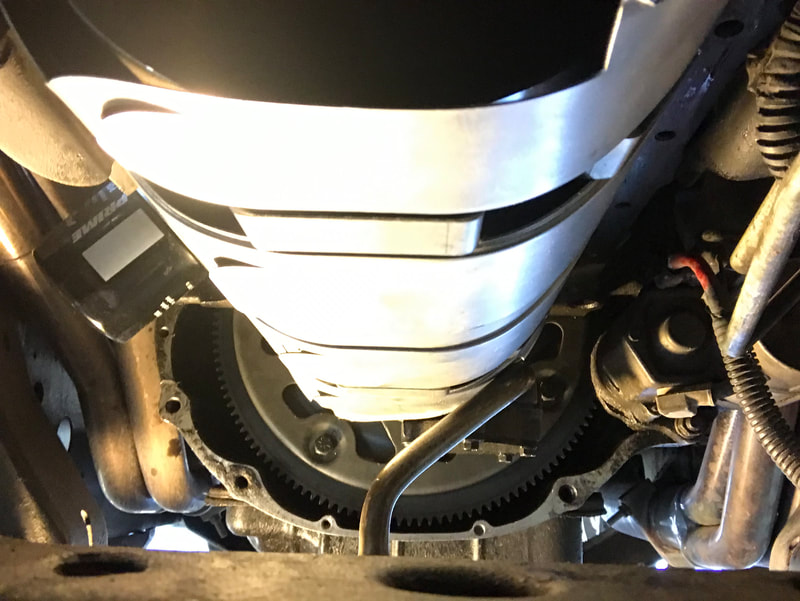
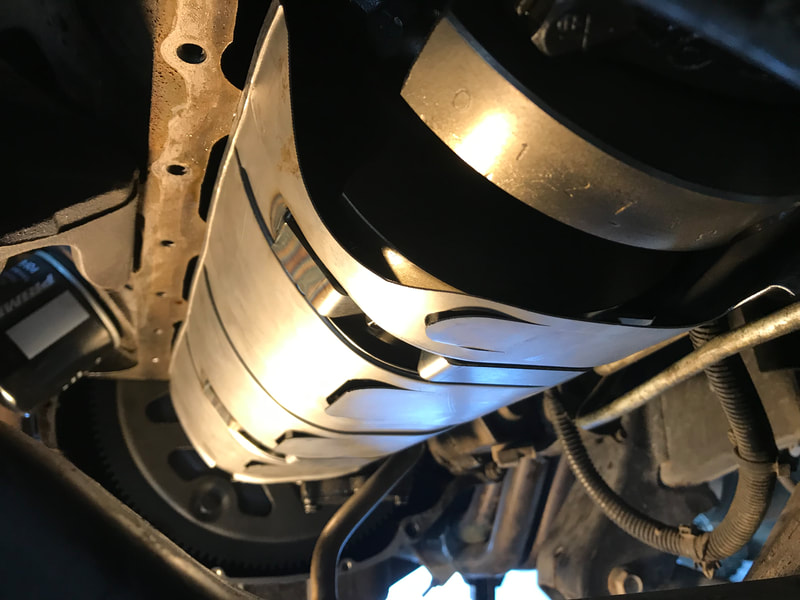
We are installing a Mopar Performance windage tray to cut the oil rope off our crankshaft. We expect to see gains from 3000-6000 rpm using our 240 cfm ported long runner kegger intake manifold and the UTP 500 camshaft. Once installed the coil and injectors were disabled and the crank rotated by hand and then using the starter to verify no interference issues.
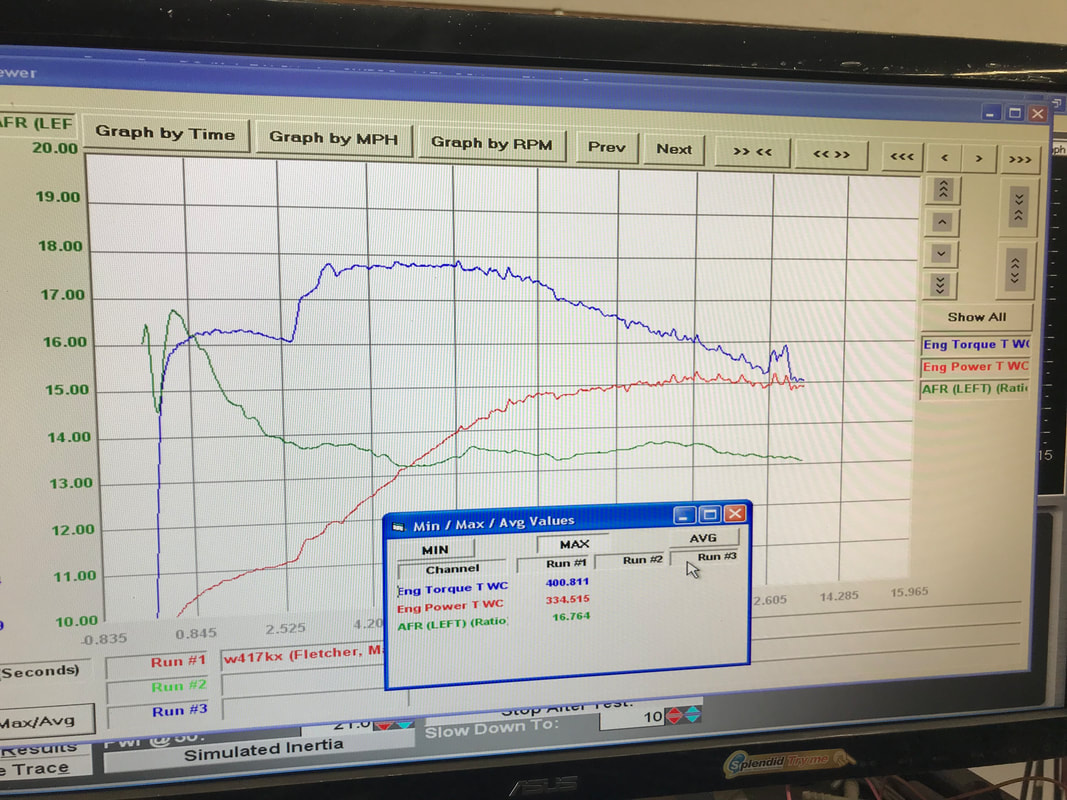
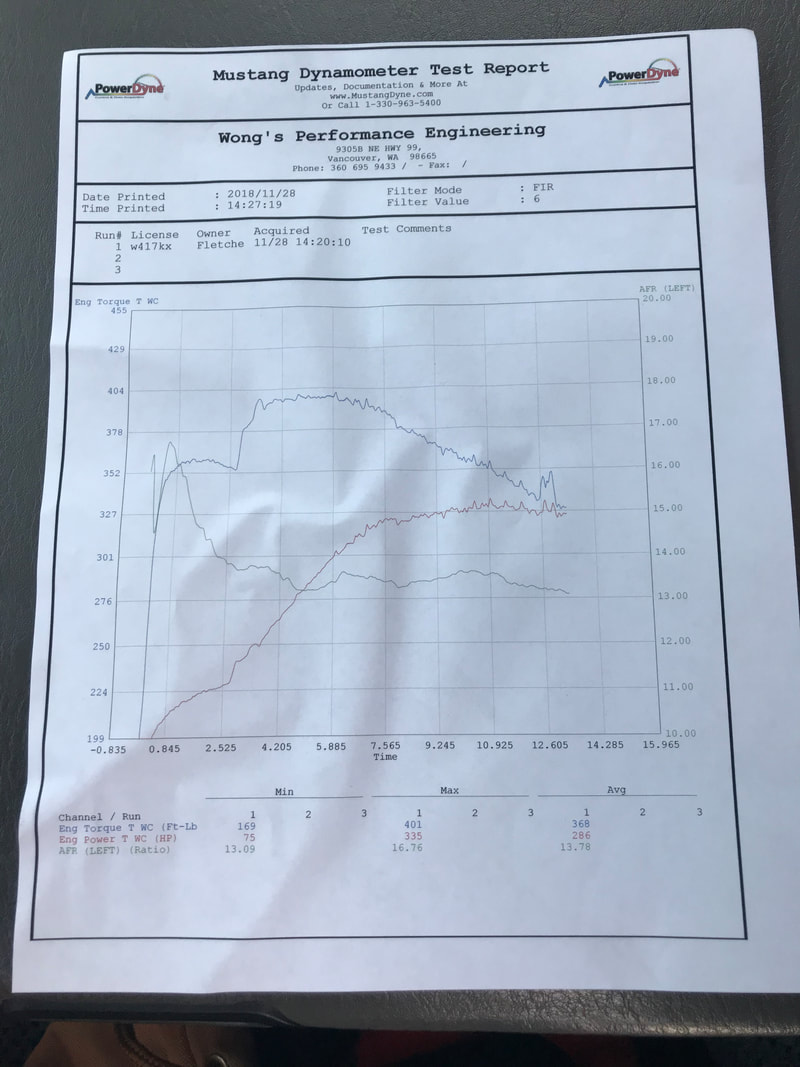
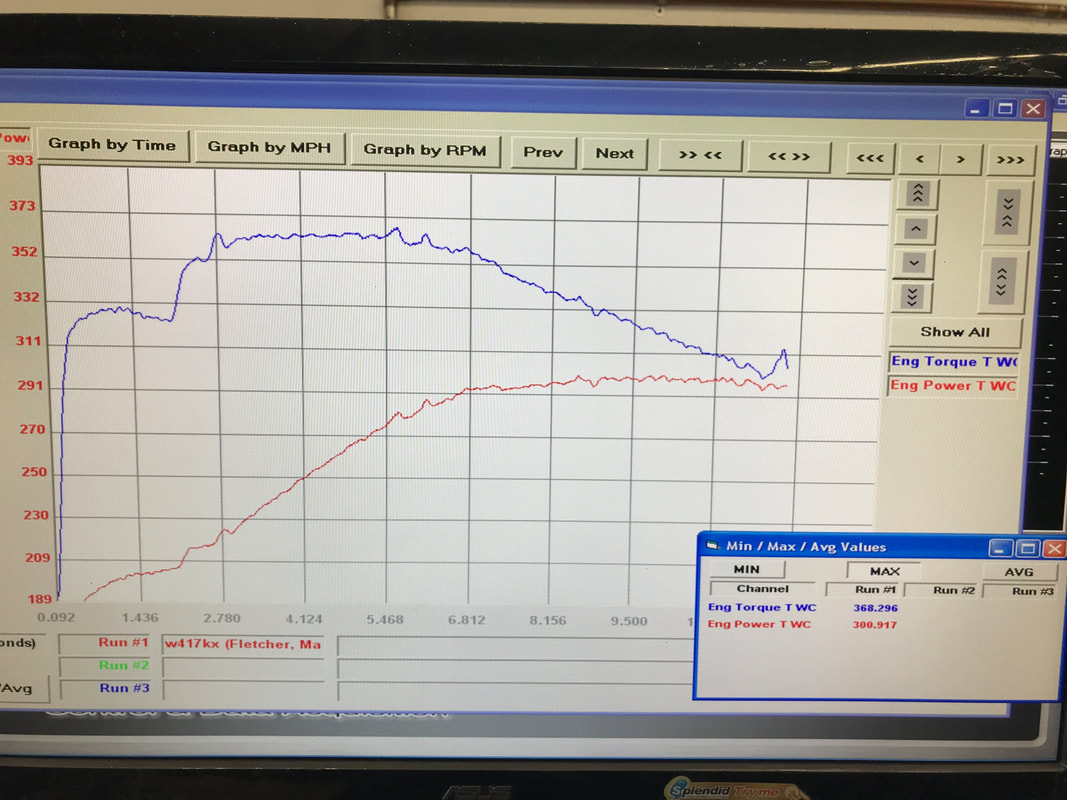
Can you push the boundaries of what we have always forsaken? Yes you can. This past year has been a nice trip into developing the max torque all motor from the 360 Magnum. I started with the UTP450 camshaft profile, moved onto the UTP450X which we will now call the UTP500 and then traveled from 5000 feet altitude in Utah on a Mustang Dyno to 1000 miles away at another dyno at sea level. The original goal was never horsepower, it was low rpm torque. All of my dyno's in the past that included the Mopar Performance M-1s made great horsepower, but never impressed me with torque- as they made it at a peak rpm of 4000-4500. The factory kegger was always 3000-3500 flat as a board. Most complained it fell off at 4200-4500 rpm which was a safe claim. It is a truck manifold, made to move heavy 4000lbs and greater. So along came the fuel injected M-1 and AirGap and everyone needed that high horsepower for some reason in their heavy 4000lb truck. The kegger and factory Magnum heads became the forgotten child no one ever used. Well that child grew up. Here is my current combo and full specs on the 5.9L that made 400tq today on the loading Mustang dyno in Washington State. 1998 360ci block Stock Magnum Rods 6.123" Stock Cast crank turned 0.010" Bore cleaned up with TQ Plate to 4.030" Silvolite Factory Dished Hyper pistons with skirt coating Zero Decked for 10.3 compression Standard Ring set gapped 16/18 Melling HV72 Oil Pump Stock 1.92" Magnum Heads with Mopar 062 Springs and retainers (cracked seats) new seals Fel Pro 1008 Head Gaskets UTP450X (Now called the UTP500) degreed in at 108 CL Comp 3103 Timing set Stock Balancer and flexplate Stock Pushrods, Lifters and Rockers Mopar Performance Tall Valve Covers DNA Motorsports 1 3/4" Longtube Headers Twin Magnaflow 3" Bullets with no crossover or cats. Factory Fuel Pump and injectors Valley Pan Heat Shield Stock Kegger ported to 230+cfm and VRP Plates installed Hand ported 53mm throttle body Autolight 3924 Plugs gapped at 0.040" Accel Coil 7mm Plug wires with brass cap and rotor SCT X3 Tuner K&N FIPK Ram Cold Air with SRT 4 twin electric fans. 5" Crank pulley and shorter belt Fuel Sync at 3-4, 195 Degree thermostat - 850 idle 92 Octane 335 horsepower and 401 torque from 3200-4200rpm rear wheel This best effort run above is sea level, 98 octane fuel, 34 timing and 13.5 afr at wot engine cooled down for 30 minutes. Here is 92 octane at Sea Level, back to back hot runs, 32 degrees timing and 12.8 afr at WOT. SO as you can see, heat soak, octane and spark curve make a huge difference in power. But the main point is that even though my old Magnum heads are cracked across the valve seats, and the kegger is butt ugly-long runners and swirl port chambers will win the race with torque long before horsepower will. Move yourself onto a better set of EQ 2.02 heads or Edelbrock Aluminum Magnum heads to climb this ladder further on motor. Who's your doorstops now...
You are the target. Not just the target of this article, but the target of big oil industries looking to take your hard earned cash from your account. Are you paying higher fuel costs each week and looking for any relief? If you happen to own any 1992-2003 Dodge Trucks or Jeeps that run the 3.9 V6, 5.2 V8 or 5.9 V8, then you know that gas mileage is terrible to start with. On top of that, you seem to have been adding more oil to the engine lately than normal. If that is you, then here is a modification you may be interested in performing or having a mechanic perform for you. If you are not interested in saving money then do not read on…
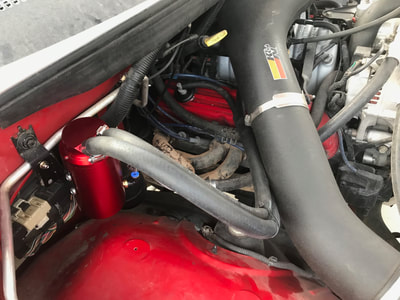
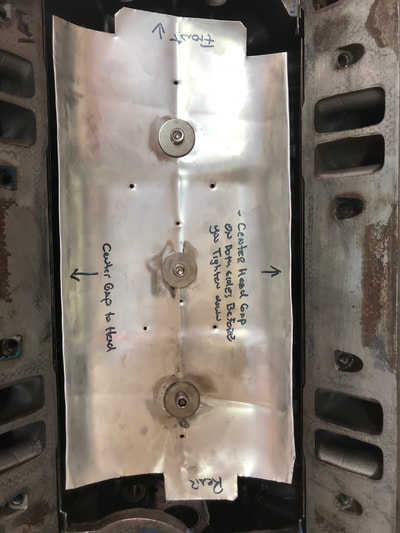
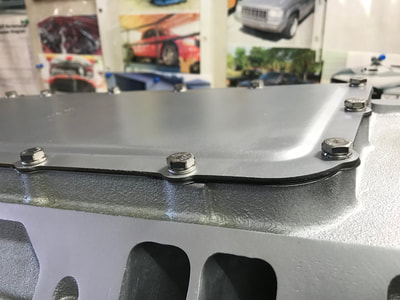
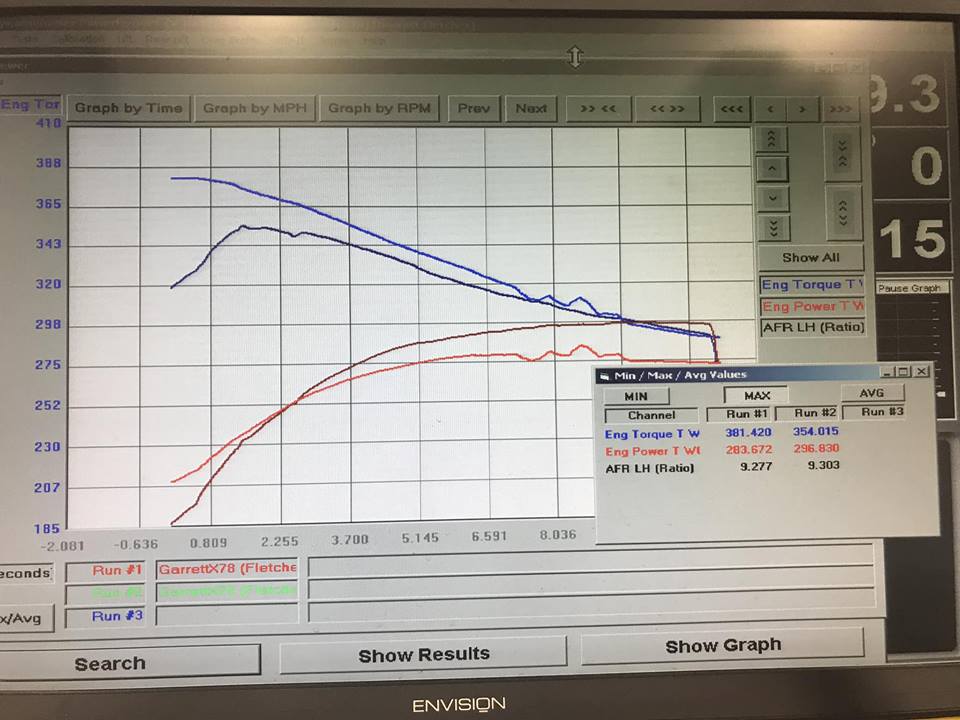
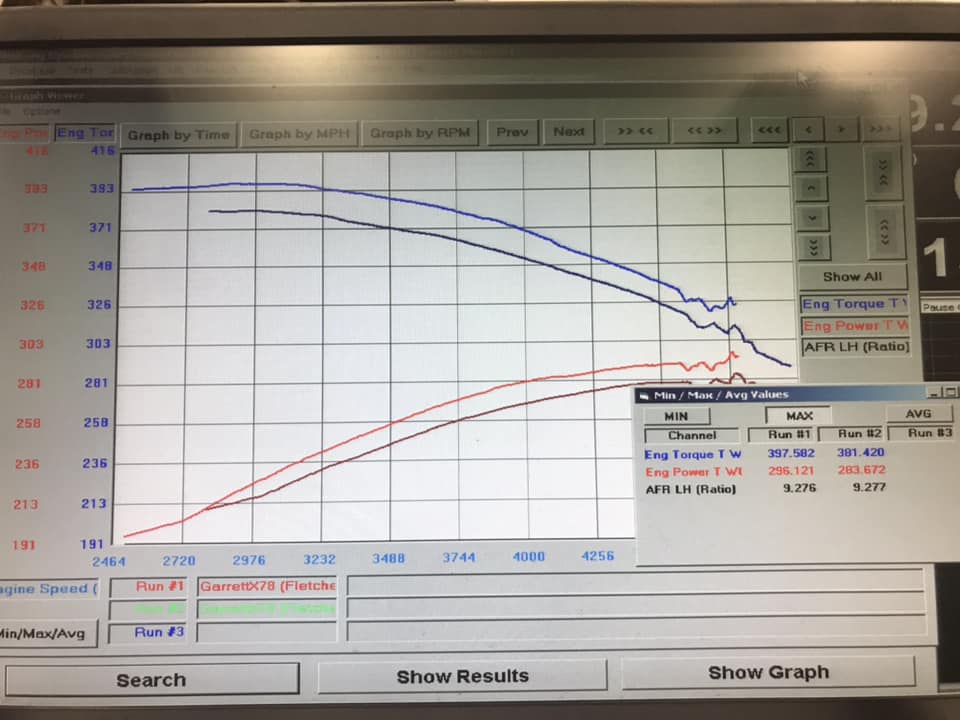
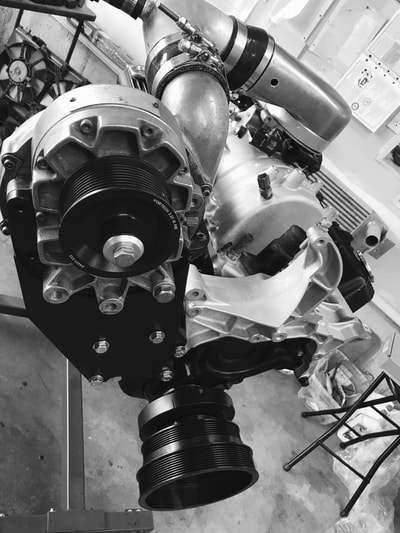
The Dodge/Jeep Magnum engine family consisting of the 3.9 V6 through the 5.9 V8 use a cast aluminum intake manifold that are the same. The only difference in the V6 version compared to the V8 is that 2 runners are missing from the smaller intake. Everything else in the design is identical. When Dodge designed the manifold, the casting factory used a mold that required the use of the plenum belly pan gasket and plate on the bottom side of the intake. As miles go by, this belly pan gasket begins to leak and eventually blows out. What that does is suck hot engine oil inside your intake manifold that is only supposed to be moving air through it. The symptoms are oil burning blue out the rear of the vehicle, high oil consumption, erratic idling due to the vacuum loss and low power with excessive fuel costs. There are literally 600, 000+ documented service tickets across the fleets that have been repaired and completed. That is just dealerships in the system; this does not include independent shops or other make dealerships. The repair has always been the same; the technician removes the intake manifold, cleans it, installs a new belly pan gasket along with new intake manifold gaskets, tops off the coolant and sends you on for 3 hours labor charges plus parts. Now depending upon your driving and use, this usually last for about 30,000 miles. Some have gone much further never wondering why they have all these symptoms of excessive fuel and oil. If you do not care, then you are not supposed to be reading this article as explained in the beginning. But continuing, along with this normal repair, there are a few additional things that can be done to keep you from ever performing or paying for that job again. If you are the ‘do it yourself’ mechanic, feel free to tackle this with minimal cost. If you are not, then you will need to find a competent mechanic who will do this for you. The 15 bolts that retain the belly plate to the lower intake manifold unfortunately are too long. Before they can seal and crush the gasket to the intake lowers, they bottom out. This explains WHY the repaired gaskets blow out later on. Simply purchasing ¼” lock washers and flat washers at your local home improvement or hardware store will solve this. Second, if your new belly pan gasket is made of paper or the premium steel one from the dealership, you still need a thin coat of sealant (RTV Black) on both sides of the gasket. Third, you will need to purchase Red LocTite to ensure the 15 bolts will not come loose- even though you have lock washers installed. These simple cheap steps will cost no more than $15 compared to the 3 hours labor bill every 2 years. Three simple and cheap yet effective steps to stop the oil burning in the intake manifold that should always be done to effectively end the blown gasket problem and issues it causes. So how do we take this one more step to get performance and additional miles per gallon? Simple, with two additional modifications, you will see 2-3 more miles per gallon on average. The cost of these two modifications will average around $60. You will make that back in the first month of driving due to fuel savings costs. For the Jeeps that are required to run premium fuel due to the higher spark advance in the engines computer, you will be able to run 86/87 low octanes. The cost of 93 octane to 86/87 is a huge fuel savings. The past solution was to run a lower temperature thermostat from 195 degrees to a 180 degrees thermostat. This lowering of the intake manifold temps allowed lower octane to be used, but in the winter is not warm enough to take the chill off of the driver. With these two modifications, you will be able to run a hotter 195 degree thermostat and lower octane fuel. The first modification is an oil catch can that prevents oil from being pulled into the intake via the PCV valve. There are many nice polished, anodized and billet catch cans available from Amazon online that can be delivered to your door for $30. The installation is simple- the PCV vacuum line that originally connected the valve cover to the intake manifold, now routes to the oil catch can, then the outlet of the can connects to the intake manifold. This traps any oil that is pushed out of your PCV valve and prevents it from being introduced into the intake manifold (burning oil). The can has a small drain on the bottom and sight gauge to tell you if it is filling up. A new PCV valve $10 is worth adding at this time also. The final modification is a trick that automobile manufactures used to employ, but no longer use. It was called the valley pan gasket. You see, underneath the intake, that belly pan has hot engine oil splashed on it when running. This heats up the lower belly pan to 180-200 degrees and higher. By preventing this issue, the manifold, even running a 195 degree thermostat, will see temps in the 140-150 range. Much lower than 180-200 temps that splashed your newly replaced plenum gasket and pan. The valley pan gasket shields the oil from hitting the intake and allows dense cooler incoming air to feed the cylinder heads. That in turn makes more horsepower and torque. Since no one makes a valley pan gasket for the Magnum series engines, you have to be creative. The easy solution is to purchase a Valley Pan Intake gasket from NAPA for a 1970-383cubic inch big block Dodge or Chrysler V8. This will run about $28. With the intake manifold removed, trim the sheet metal gasket to fit in the valley. When trimming the sides of the gasket, you will want to keep the edges of the pan as close to the cylinder head as possible blocking as much oil splash as possible. To clear the intake manifolds lower plenum corners, you will need to cut a 1” square from each corner. Using the 3 factory bolts that hold down your lifter retainers (you will see them), align and drill three holes to bolt the pan to them. Now simply take a sharp punch and punch a small hole in the middle rear of the pan for oil to drain out if it makes its way above the pan. Install fresh intake manifold gaskets and then install the manifold directly over it as normal. Top off the coolant, and fill her up with fresh 87 Octane fuel. The addition of this valley pan shield and catch can has allowed dyno testing of performance engines to use 87 octane as compared to 91/93 premium. Although you may not be building a performance engine, you WILL benefit from using cheaper 87 octane fuel and not adding a quart of oil every week to your engine. That is money and savings that will stop the leaks from your intake manifold- and your wallet! 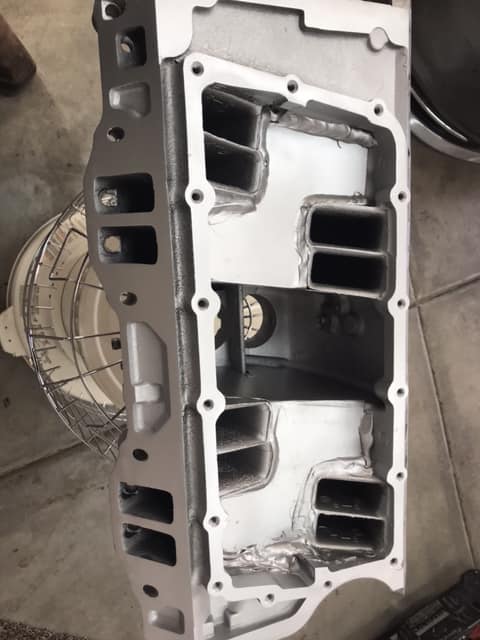 Do you have a secret? Hidden and buried far in the recesses of your neural network? Something that you are guarding, so that it never gets out to anyone but maybe a chosen few? Well, I don’t. Concerning my engine building and tuning skills, there are very few things I keep to myself. I share it on my website, and in the forums for all to take it or leave it. Here is the interesting story of the Dodge Truck intake manifold concerning my work and its impact on the world. First, for those who do not care to know the details, I promise not to bore you to death with technical jargon and flow numbers. I am simply going to start from the beginning and paint a picture in your mind of this long trip I have been on. Way back in 1992 the engineers at Chrysler/Dodge redesigned the old 318 and 360 cubic inch V-8s. Their work added a newer roller camshaft, hydraulic lifters, revised cylinder heads, higher flowing exhaust manifolds and a long runner redesigned intake manifold. They coupled that with the latest multiport fuel injection to produce 230 horsepower and a whopping 345 torque for excellent smooth power and efficient fuel economy. It was years ahead of the old throttle body injected low power 318/360s of 1970-1991. It did not take long for the aftermarket to notice these engines and soon, you could buy headers, exhaust, camshafts and Mopar Performance released special recalibrated computers for even higher horsepower gains. Finding those today is like finding a gem in Solomon’s Mines. But I imagine there are many out there in junkyards across the USA if you take the time to search. So moving on, I am going to tell you about my interesting story of that redesigned intake manifold and how it has changed my business sales almost three decades later. Somewhere around the years 1999-2000 Mopar Performance finally released a fuel injected version of the intake manifold dubbed the M-1. My speed shop at the time literally sold thousands and was reported the highest sales by Mopar Performance for this intake manifold. Literally every truck that came into the shop, had the stock intake pulled off and thrown into the garbage to install these performance manifolds-along with other matching items. In my quest to produce the best and highest horsepower numbers on our dyno (a machine that measures the horsepower of the engine) we ignored the loss in torque and concentrated on the horsepower. Mainly, because that is what sells- as torque is too often misunderstood. We give too much emphasis on horsepower instead of torque. Even this article is named Horsepower Secrets, not Torque Secrets for a reason. So with all the high flowing cylinder heads and intake profiles making high horsepower, I noticed we had to install steeper rear end gears and higher stall torque convertors in the transmissions to get the truck out of the gate faster. I made sales on those additional items so it was never a question to change my thinking. Come forward to 2018 and I found myself moving to the higher altitudes of Utah and lack of oxygen up here really made for gutless engines. Back down at sea level, they ran outstanding, but up here I lost almost 35% of my power. That is over 80 horsepower and torque gone! Second, I had all these customers who had followed that old recipe of installing the short runner high rpm M-1 intakes on their trucks, yet they were complaining they could not spin the tires. They had been fed a lie that the stock intake is worthless. What they failed to realize is that they needed torque at a much lower rpm in those heavy trucks than that performance manifold would ever deliver. So I began my testing on the stock intake manifold that began with all the nay-sayers posting up comments such as ‘waste of time, worthless’ and many others I will not repeat. First I started with a stock 360, reprogrammed it and then redesigned the camshaft profile to a single pattern compared to the split pattern that even the factory had used. Single pattern cams in the past have always been known to produce more torque than a split pattern camshaft. I was rewarded with a 60 foot pound gain of a camshaft change only. Most dynos across the US had reported measured torque around 270-280 and here was mine at 350 torque using the stock intake manifold. Next I worked on calculating the airflow the cylinder head needed and how restrictive the stock intake manifold really was. It actually was not that terrible. I found myself going to my favorite junkyard and buying up stock intake manifolds. The old method for budget racers was to shorten the long 18” runners to 16”. This gave them gains in the midrange and upper rpm as the stock intake usually stopped making power past 4500 rpm. I changed that up and not only shortened the runners but opened the inside of the runners up with super long porting bits that could reach in there. I had my baseline measured numbers from before, so I would test each configuration on the dyno. Some results were good others where terrible. At one point my torque fell from 360 down to 300. But then the greatest change came when I decided to reduce the volume area inside the intake manifold in hopes of speeding up the velocity of the incoming air. To do this I simply cut up some sheet metal and trimmed it to cover up the huge voids in the intake manifold. Once I sealed it and painted the manifold, I posted up a picture of my mad science for the forum to see. As usual there were two camps, those who were interested in seeing what the outcome was going to be good or bad and those who said it would never work. Discussions of velocities, cross sectional areas, individual port starvation flooded the forums with this crazy experiment Fletch was up to. So early in the morning, I installed the intake manifold and scheduled to rent the dyno in the afternoon. The first thing I noticed driving was that the truck had excellent torque and effortless throttle just driving around town. It did not feel any stronger at wide open throttle and I have learned that even though something may feel better on the street, the dyno will break your heart and show a loss. So everyone waited as the afternoon dyno appointment approached. As I arrived and strapped down the truck for the test, I had to tell myself that even if it was terrible, I would continue to push the research. My best numbers before on a fully ported 18” runner intake were 297 horsepower and 354 torque. Now I had a non-ported intake with only the volume reduced in half. It was time- I stabbed the throttle as the engine roared to 5000 rpm. My wife was taking video of the run and plugging her ears at the same time as the engine ran through the test. To everyone’s surprise, the first pull was 283 horsepower and a whopping 381 torque!! I had only lost a few horsepower and gained 27 foot pounds of tire shredding torque. I knew from my past test that just letting the engine cool down between runs was a sure fire way to increase those numbers. So we let it cool down with a fan for 15 minutes. During that cool down time, I posted up my first dyno run real time with the video and the forums ignited like an IED on the road to Bagdad. It was time to make the second run. Engine on, gearshift in drive and throttle rolled into, I opened her up. The engine roared to 5000 rpm again and I let off when the test showed complete. I nearly fell out of the truck as the dyno trace graph posted 339 horsepower and massive 404 foot lbs. of torque at 2900 rpm! The dyno has weather and altitude correction factors and when pulling up the graph, it showed a smooth gain and corrected numbers of 296 horsepower and 397 torque. Never before had anyone posted a stock intake manifold making anything over 300 tq yet here it was at 400 plus. That meant that that engine had to be producing 490 torque at the crankshaft. The most amazing part is that nearly 90 percent of the guys running the performance M-1 manifold and head combos are only making 330-340 tq. What is the moral of the story? Never under estimate factory designed parts, as millions of dollars were spent designing them and no easy thoughts went into that. So remember when you build for torque, the horsepower numbers will fall into place. As my old Pops used to tell me growing up- “Son, horsepower is how fast you will hit the wall. Torque is how far ‘through’ the wall you will continue.” So this month, we are taking a bold step with stock heads and stock intake manifold. We are installing PIE's Vortech Supercharger on the Big Red Dirt Ram. If you do not already know, the Ram is a stock 9.1 compression 360ci with the UTP450 camshaft. So now, it is getting prepped for the installation beginning with cooling here in Utah. Twin Mishimoto's are in place with a 160 thermostat and the program has been changed to accommodate closed loop at the lower temp. Our blower is an oil supplied and return V-1 head. You can use a Paxton or Vortech with their mounting bracket. Our oil pan is getting tapped for the return oil as we are using the V-1. V-3 blowers, will not need that. Also being installed are the 60lb high impedance injectors and a GM 2 bar map sensor. A quick reprogram in the SCT for idle, drivability and 11.5air ratio at WOT will be added. You can also plumb a intercooler in place, but we are starting with none. Boost level can be controlled on this kit also from 3 psi to 20 psi, more on that later! The greatest part of this kit is the separate belt driven blower. No more serpentine mods and additional guide rollers needed to keep the belt from slipping. Dyno tuning will be performed on the Mustang loading dyno to really get the headers glowing.
So this month has been incredible for reaching goals. There are so many 360ci's that get rebuilt monthly coming through our machine shop and the main question I get asked is how to get the towing power higher without buying a diesel. Of course we are at 5000 feet in Utah and lose a solid 30 percent torque and horsepower. So this month, we are taking a 360, performing a fresh rebuild and using the same formula we used in testing the UTP450 camshaft, installing it in a normal 3.55 geared Ram 2wd. That camshaft already tagged 450 tq. That means, bone stock intake manifold, stock 1.92" untouched Magnum heads with 1.6 roller rockers and a valve spring upgrade. The main difference is the compression. We are zero decking a piston height that is normally fifty to sixty thou in the hole. So the last dyno was in a 4x4 pushing 37" mudders. The transmission has been rebuilt with a billet plate torque convertor from Randy's Transmissions in Tooele Utah. Those that do not know Randy's work, simply look up Red Delicious Ram Utah-nuff said. I believe too many underestimate the change from LA engine heads and intakes to the 92 Magnum design. So many throw away the stock long runner intake for shorter runner intakes. Only to find that their peak torque is no longer at 3000 rpm but above 4000. Every build should have a purpose and that purpose needs to have matched components. So many of us have forgotten that purpose built LA 360's made 500 foot pounds. You do not need a 4" stroke crank to achieve that. Although it is easier to hit with that crank than your stock 3.58" stroke. So stay tuned, our goal is to get as close to 400 tq at the rear wheel on this stock rebuild with excellent drivability. I had a customer running a competitors camshaft, single plane manifold and stock parts with another's tune in it. His complaint was that he could not spin the tires and no power till past 3000 rpm. After sending him a free tune to check the cal, the problem was still there. I recommended he clean up his old stocker intake manifold and simply try it. Here is his response:
-Just wanted to say thank you for the information on swapping intakes I put the stock one back on and made a big difference... If you don't spend every waking moment at WOT with gears and higher stall, rethink your purpose. You will not see many 360's making 400rw torque on motor, even some 408 dyno's sent to me do not hit it. Do not listen to the folks who say a camshaft change should never be used with a stock kegger intake and stock heads. They will learn sooner or later. Remember, rumors are carried by haters, spread by fools and accepted by idiots. Stay tuned for all my details and specs on this rebuild! |
Marty FletcherHands on engine builder and tuner for Dodge since 1993. Archives
July 2023
Categories |
